
Key takeaways
- A capacity number appears without tubing size, steel gauge, or an explanation of what component it covers.
- The listing shows a cable system but does not state whether plates, handles, pulleys, or mounting hardware are included.
- There are no clear assembled dimensions, hole-spacing measurements, or ceiling recommendations.
- The rack has no anchoring instructions, narrow feet, or lightweight-looking base despite a very high capacity claim.
- Safety arms are short, lack locking hardware, or are shown only in staged photos.
- The warranty excludes the frame, replacement parts, or damage caused by normal use without explaining the exclusions.
- Reviews repeatedly mention missing bolts, bent brackets, unstable pull-ups, or cables that fray early.
What's inside
- Decide These 3 Things First
- Size: Measure the Rack and the Training Zone
- Material: Look Beyond the Steel Label
- Construction: Stability, Adjustability, and Safety Hardware
- Comfort and Performance: Choose Attachments You Will Use
- Price Tiers: What You Can Expect to Get
- Warranty: Read the Coverage, Not Just the Length
- Delivery and Assembly: Budget Time and Extra Help
- Spec Checklist
- Red Flags
- FAQ
Buying a power rack is less about finding the biggest number on a product page and more about matching the rack to your room, barbell, training style, and tolerance for assembly. Many shoppers make the same mistakes: they trust a headline weight rating without checking how it was tested, overlook the rack’s footprint and ceiling clearance, buy a cable-equipped model they will never use, or assume every “power cage” offers the same stability.
- Decide These 3 Things First
- Size: Measure the Rack and the Training Zone
- Material: Look Beyond the Steel Label
- Construction: Stability, Adjustability, and Safety Hardware
- Comfort and Performance: Choose Attachments You Will Use
- Price Tiers: What You Can Expect to Get
- Warranty: Read the Coverage, Not Just the Length
- Delivery and Assembly: Budget Time and Extra Help
- Spec Checklist
- Red Flags
- FAQ
In 2026, home-gym racks range from compact squat stands to full cages with pull-up stations, pulley systems, dip handles, landmine attachments, and storage. The right choice can make heavy squats and presses feel controlled. The wrong one may wobble, block a doorway, or leave you with an expensive machine that does not fit your training.
As an Amazon Associate we earn from qualifying purchases at no extra cost to you. Product prices and availability are accurate as of the date shown and are subject to change.


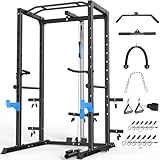

Decide These 3 Things First
- Where will it go? Measure the complete usable area, not just the empty floor. Include space for plates, a bench, the barbell sleeves, and your body position during pull-ups.
- What will you lift? A beginner focused on squats, presses, and deadlifts has different needs from someone who wants cable rows, lat pulldowns, dips, and accessory work.
- How much stability do you need? A bolted rack is a different category from a freestanding rack. If you lift alone, train heavy, or use aggressive pull-ups, prioritize a four-post cage, substantial feet, and included safety hardware.
Size: Measure the Rack and the Training Zone
Most full power racks are roughly 45 to 55 inches wide, 45 to 55 inches deep, and 80 to 90 inches tall. Compact half racks may be only 40 to 50 inches deep, while racks with rear-mounted pulleys or plate storage can extend beyond 70 inches. Always use the assembled dimensions rather than the shipping-box dimensions.
Height is especially important. A rack listed at 83 inches may not work in a basement with an 84-inch ceiling once you account for an uneven floor, a pull-up bar, and the clearance needed to assemble the top crossmember. For comfortable pull-ups, aim for at least 12 inches of space between the top of the bar and the ceiling. If your ceiling is low, choose a rack under 72 inches or plan to use a lower pull-up position.
Allow at least 3 feet of open space in front of the rack for a barbell and bench. Four feet is more comfortable, particularly for stepping back from a squat. You also need enough width for the bar: a standard Olympic bar is about 7 feet long, so leave roughly 12 inches of clearance on both sides if possible.
Material: Look Beyond the Steel Label
Steel thickness and tubing size tell you more than a large “2,000-pound capacity” claim by itself. Common home racks use square steel tubing measuring approximately 2 by 2 inches, 2 by 3 inches, or 3 by 3 inches. Steel gauges vary, but 11-gauge tubing is generally heavier than 14-gauge tubing because the number is lower.
For general home strength training, look for at least 2-by-2-inch, 11- or 12-gauge uprights. A 3-by-3-inch frame can provide a more substantial feel, but it often costs more and may use proprietary attachments. Check the diameter of the holes as well. One-inch holes are common on budget racks; 5/8-inch and 1-inch holes are both usable, but attachments are not always interchangeable.
Do not treat the advertised capacity as a universal promise. A rack’s real-world stability also depends on its base, bolts, safety arms, floor contact, and whether it is anchored. A “1,200-pound” or “2,000-pound” rating may refer to a component or a manufacturer’s design specification rather than a standardized independent test.
Construction: Stability, Adjustability, and Safety Hardware
A full cage surrounds you with four uprights and usually includes horizontal safety bars or straps. A half rack leaves the rear open and can save space, but it may require more care when re-racking a heavy bar. For solo training, full cages generally offer more containment and adjustment options.
Count the adjustment positions and the spacing between them. Two-inch hole spacing in the benching area makes it easier to position J-hooks and safeties precisely. Three-inch spacing can be adequate, but you may have to compromise between a comfortable press height and a safe squat height. Westside-style spacing—approximately 1 inch through the bench zone—is useful but more common on premium racks.
Look for two independent safety supports, not just J-hooks. Safety pins, safety straps, or spotter arms should extend far enough to catch the bar without forcing you to twist. A rack intended for serious loading should include a way to anchor it to the floor or wall. If anchoring is not possible, choose a wide base, heavy feet, and storage posts that keep plates low and centered.
Inspect the connection points in the product photos and manual. Thick gussets, multiple bolts at each joint, welded crossmembers, and non-slip feet are practical indicators of a more rigid design. A rack that relies on small plates, thin brackets, or a single bolt at major joints deserves extra caution.
Comfort and Performance: Choose Attachments You Will Use
A pull-up bar is one of the most useful rack features, but its shape matters. A straight bar is versatile; multi-grip bars offer more hand positions but require additional ceiling and head clearance. A knurled or textured grip can improve control, although an overly aggressive finish may be uncomfortable during high-repetition work.
J-hooks should be lined with plastic or another protective material so they do not unnecessarily scrape the bar. Check whether the hooks lock onto the uprights or simply rest on them. Locking hooks are preferable when repeatedly re-racking heavy loads.
Lat pulldowns and pulley systems can add value, but assess them realistically. A home cable system may use a 1:1 ratio, meaning a 100-pound stack or plate load feels close to 100 pounds before friction. A 2:1 ratio feels lighter and usually provides smoother movement and more cable travel. Ask whether the system includes a weight stack or requires loading Olympic plates, and check the maximum recommended load, cable length, and included handles.
Dip handles, a landmine, plate storage, and a low row station are worthwhile only if they fit your routine. Attachments can also increase the rack’s depth and create interference with a bench. Think of each accessory as part of the layout, not a free bonus.
Price Tiers: What You Can Expect to Get
Budget: $250 to $400. This tier includes many compact cages and multifunction racks sold with J-hooks, safety bars, pull-up bars, and basic cable attachments. The example models you listed fall around $270 to $320, including the SPORTSROYALS model at about $319.99, the JELENS S11 at about $309.99, the ULTRA FUEGO at about $299.98, and the JEEKEE model at about $269.97. At this price, carefully verify tubing gauge, hole spacing, included hardware, and whether the pulley system is complete.
Mid-range: $400 to $900. Expect heavier frames, better fit and finish, more adjustment positions, stronger hardware, and a broader attachment ecosystem. Some racks in this tier are designed for anchoring and may have more consistent dimensions between accessories.
Premium: $900 to $2,500 or more. Premium systems may use 3-by-3-inch uprights, 11-gauge steel, high-quality safeties, modular attachments, plate-loaded or selectorized cables, and extensive storage. You are paying for rigidity, compatibility, service, and refinement—not necessarily a proportionally higher maximum lift.
Warranty: Read the Coverage, Not Just the Length
A one-year warranty is common on budget home racks, while stronger brands may offer five years, 10 years, or limited lifetime coverage on the frame. Separate coverage often applies to cables, pulleys, upholstery, hardware, and finish. A lifetime frame warranty does not mean every part is covered for life.
Before buying, confirm who handles claims, whether replacement parts are available in the United States, and whether the warranty requires professional assembly or anchoring. Save the manual, hardware list, receipt, and photos of any damage on arrival. A clear parts policy can matter more than an impressive headline warranty.
Delivery and Assembly: Budget Time and Extra Help
Power racks commonly arrive in multiple cartons and may weigh 150 to 300 pounds in total. A single box can exceed 70 pounds, so plan for two-person handling, particularly up stairs. Inspect every carton before signing when possible, and photograph crushed corners or missing hardware.
Assembly often takes two people three to six hours, depending on the frame, pulley system, and storage attachments. A basic cage may need only standard metric or imperial wrenches, but some models benefit from a torque wrench. Do not fully tighten every bolt until the frame is square; then tighten in stages and recheck the hardware after several workouts.
Measure doorways, stair turns, and elevator openings before ordering. If the rack is going in a basement, assemble it near its final position. Add the cost of a rubber lifting platform, floor protection, anchor hardware, or professional assembly when comparing apparently similar prices.
Spec Checklist
| Spec | Budget | Mid | Premium |
|---|---|---|---|
| Typical price | $250–$400 | $400–$900 | $900–$2,500+ |
| Upright tubing | 2 x 2 in.; 12–14 gauge | 2 x 3 in.; 11–12 gauge | 3 x 3 in.; about 11 gauge |
| Height | 72–85 in. | 80–90 in. | 80–95+ in. |
| Adjustment spacing | 2–3 in. | 1–2 in. in bench zone | About 1 in. in bench zone |
| Safety system | Pins or spotter arms | Longer safeties or straps | Heavy-duty straps, pins, or monolift-compatible options |
| Warranty target | 1 year | 3–5 years on frame | 5 years to limited lifetime on frame |
Red Flags
- A capacity number appears without tubing size, steel gauge, or an explanation of what component it covers.
- The listing shows a cable system but does not state whether plates, handles, pulleys, or mounting hardware are included.
- There are no clear assembled dimensions, hole-spacing measurements, or ceiling recommendations.
- The rack has no anchoring instructions, narrow feet, or lightweight-looking base despite a very high capacity claim.
- Safety arms are short, lack locking hardware, or are shown only in staged photos.
- The warranty excludes the frame, replacement parts, or damage caused by normal use without explaining the exclusions.
- Reviews repeatedly mention missing bolts, bent brackets, unstable pull-ups, or cables that fray early.
FAQ
How much ceiling height do I need for a power rack?
Measure the rack’s assembled height first. For comfortable pull-ups, aim for at least 12 inches of clearance above the bar. In many rooms, a rack between 72 and 84 inches tall is easier to use than a 90-inch model.
Is a power rack better than a squat stand?
A power rack provides more protection because the uprights and safety supports surround the lifting area. A squat stand is usually smaller and less expensive, but it offers less containment and may need to be stored between workouts. Choose the rack if you train alone or plan to progress to heavy squats and presses.
Do I need to bolt my power rack to the floor?
Anchoring is strongly recommended for heavy lifting, kipping pull-ups, and racks with long spotter arms. If you cannot anchor, use a rack with a wide, heavy base, keep plates stored low, avoid swinging movements, and follow the manufacturer’s instructions.
Are budget power racks safe?
They can be suitable for home use when assembled correctly and used within their stated limits. Focus on complete safety hardware, stable feet, accurate dimensions, secure J-hooks, and a clear warranty rather than choosing solely by the largest advertised weight rating.


Write Your Review
No reviews yet. Be the first to share your experience!