
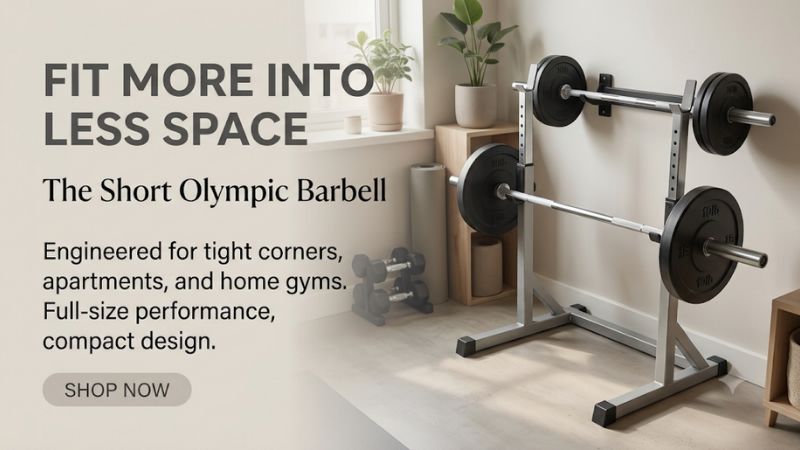
A short Olympic barbell for small spaces gives you more room to walk around the ends, load plates, and move the bar between sessions. The right length depends on how you train and where you store it. Start with the rack, measure both loading zones, then check how far a loaded bar extends into the rest of the room.
Measure for a short Olympic barbell for small spaces
Begin with your intended lifting position and measure at the heights you will use it. The floor-level space available for a deadlift can be different from the space at shoulder height for a squat. Mark the bar’s centerline on the floor and map both ends, the lifter’s position, and how plates travel onto the sleeves.
Measure the room at the height of the bar
A floor plan shows where the walls are, but door trim, shelves, light fixtures, equipment, and stored bikes may protrude above your tape measure. Measure between the closest fixed obstacles at the intended loading height. For a shared room, include items that will stay in their normal position during a workout.
Say your rack is centered against a wall with a 100-inch usable span. A 72-inch bar leaves 28 inches of space, or 14 inches on either side if obstacles are symmetric. An 86.6-inch bar leaves 13.4 inches, or 6.7 per side. These figures describe open space beyond an unloaded, centered bar. Rehearse how much room you need to hold a plate, align its hole, and slide it onto the sleeve. The larger difference may be the ability to stand where you can carry the plate comfortably.
If your room has a narrow spot near a pillar, measure each side individually. A 72-inch bar can have 20 inches free on one end and less than 8 on the other. The end with 8 inches controls whether you can load in that alignment. Adjusting the position of the rack, where the room and manufacturer permit it, may recover more working room than buying a slightly shorter bar.
Trace the path of a full-diameter plate
The plate adds a much larger moving shape than the bar’s tip. Test that shape from the place you pick it up to the face of the loaded stack. In a cramped setup, there may be enough space to slide a plate onto an empty sleeve once it is aligned, while the approach forces you to turn the plate against a wall or post.
Make a template similar in diameter to the largest plate in your kit. Hold it beside a lightweight pole representing the bar and walk through both loading motions at working height. Repeat at floor height if you plan to start deadlifts from the floor. Include the space for both hands and for moving the collar into place. If one end is blocked by plate storage, try relocating the storage in the mock layout before giving up sleeve length.
A plate on a storage horn can protrude sideways at just the wrong height for loading another plate. A movable storage rack has potential if it rests securely in its normal position. Plan one place for it during training so your plate path, bench position, and walkways are available whenever you lift.
Measure ceiling clearance with the plates installed
Overhead clearance depends on the highest point of the bar and plates during a lift. A weight plate rises above the bar centerline, so its radius must be part of the calculation. Map any beams, fans, lights, or open garage door tracks along the bar’s path. Use a light mock-up to confirm the highest position.
If the center of the bar reaches 83 inches during a press and the largest plate has a radius of about 8.9 inches, the top of that plate would reach roughly 92 inches. The same bar with a smaller plate may have a lower highest point. This example is a way to measure your layout, since your reach, stance, and exercise determine the height.
Check what happens at each end as well. A centerline drawn between two joists can look promising until a plate lands directly under one. In an apartment with low ceilings, an approved seated setup or another exercise may solve the overhead issue. Moving from an 86-inch bar to a 72-inch bar only helps where the shorter ends pass the obstacle.
Choose the bar geometry for the way you train
Short Olympic bars fall into several layouts. A rack-oriented short bar saves length mainly at the ends. A compact floor bar can save more length between the shoulders to preserve sleeve room. A lower-mass training bar can help when the same space is used by beginners or lifters working on technique with lighter loads.
Keep a full-width rack section for squats and bench presses
Start with the distance between the sleeve shoulders if you squat or bench from J-cups. Compare it with the outside span of the installed cups at the support points. You need space for the shaft to sit securely, plus clearance for a normal unrack and return without striking either shoulder against the hardware.
For example, a rack with 49 inches across the outsides of the hooks provides 2.5 inches of nominal difference against a bar with 51.5 inches between shoulders. A centered setup suggests about 1.25 inches per side before allowing for geometry and movement. A few inches of extra usable clearance across a bar can matter when a lifter approaches one hook ahead of the other. Check shoulder shape, J-cup lips, safeties, and the manufacturer’s stated fit.
If you bench with an extra-wide grip, measure hand space with your bench and hooks in place. You may find the bar fits the rack with just enough room yet a hand lands against the cup during setup. Moving hooks outside the stated configuration can create other problems. Choose a shaft and rack combination that works in its approved setup.
Use a shorter shaft when the main lifts start on the floor
For deadlifts, Romanian deadlifts started from the floor, and rows, a conventional rack span may add more width than you need. A 60- or 69-inch floor-oriented bar can make it easier to load in a garage bay or move out of the way afterward. Check that there is still enough room between sleeves for the grip and stance you use.
When the bar gets shorter, test hand placement and contact with plates during setup. A wider deadlift stance, wide-grip pull, or standing movement with extra lateral clearance can reveal practical limits. Mark your grip on the mock bar, hold it at starting height, and confirm that nearby walls or equipment will not interfere with the loaded shape.
Your plates determine where the bar starts relative to the floor. A small-diameter iron plate and a full-size training plate can produce different first-rep positions with the same bar. If your program calls for a particular starting height, include the plate diameter or an approved raised starting surface in the space plan. The shortest bar can be a poor fit if making it usable requires equipment that fills the room.
Choose a lighter bar when two people share the room
A small gym often gets more use when people can start at the loads they need. A 10 kg rackable training bar can serve lighter presses and skill work, while a 15 kg short bar may cover a stronger lifter’s sessions on the same rack. The choice depends on minimum working loads, grip preference, and the available sleeve space.
List the main movements each person performs and their lowest and highest practical working sets. Suppose one person needs an empty bar around 22 pounds to practice pressing. The second person’s deadlift only fits on the sleeves of a heavier or longer bar. Adding a dedicated light training bar can be more useful than choosing a compromise that leaves one workout incomplete. If you can choose only one bar, find the model that covers the lifts the household would otherwise lose.
Consider how the bar feels to carry and store as well. A 15 kg short bar is still a substantial, long object. If two people will move it between rooms, test the path with a mock-up and locate a stable holder at a manageable height. Purchase information often shows the direct wall dimensions, leaving the carry and storage path to you.
Plan common layouts around a short Olympic barbell
Three constraints recur in home gyms. A garage bay often loses one loading side to a door track, pillar, or parked vehicle. A spare bedroom has a door swing and shared walking space. A basement may have enough usable width near the floor yet less overhead clearance. Start with the obstruction you will encounter most.
One-car garage with a rack and limited access on one side
Put the vehicle, bike, storage bins, or workbench in its normal training position before taking measurements. Identify which side of the bar has the least room at squat height. A short rackable bar can help if it reduces the end overhang enough to load the inside sleeve and keeps the walking path available.
If the rack has side-mounted storage, trace the complete barbell and plate paths first. A leaf of a garage workbench or a long tool handle might pass under the bar and still obstruct your arms when carrying plates. Keep your most-used plates where you can pick them up, align them, and load without rotating around an obstacle. Test your largest plate on both sides, as opposite loading angles can need different approach room.
A narrower layout might also benefit from moving low storage away from the spot where a bench needs to roll or travel. Then set the bar height for a squat and rehearse re-racking with the bay in training mode. If removing a parked car is part of that plan, judge the setup with the car out and the garage door in its intended position. That gives a more realistic picture than measuring with everything temporarily cleared.
Apartment or spare bedroom with removable equipment
In a room used for other activities, the bar has two footprints. One is the space you need while lifting. The other is the place where you can put it away without blocking a door or balancing it against furniture. A short floor bar can suit a temporary lifting zone if the carry and storage paths are straightforward.
Measure the inside radius of the tightest turn between the working area and storage. Door opening width by itself tells you little about whether a six-foot bar can rotate through a short hallway. Use a lightweight mock-up at the height you can carry it, and include the angle needed to enter your holder. Choose a storage method designed for the bar and compatible with the wall, mounting surface, or stand. Store it unloaded.
For a shared floor, account for how training sounds and feels in normal use. Controlled set-downs, suitable flooring, and deliberate plate loading matter even with short bars. Floor protection can help with contact and surface wear. Building rules and the structure determine whether a particular total load or lifting method is appropriate. If you cannot use a floor movement in that room, a shorter bar alone will leave the problem in place.
Basement home gym with beams or a low ceiling
Map the heights of the usable floor areas before committing to rack placement. A basement may support benching and squats in one area and standing presses in another. Ducts, pipes, and exposed beams can reduce usable overhead width, particularly when the plates extend beyond the opening between two structures.
A low-profile rack and short bar may work together under a beam for movements with lower bar travel. For overhead work, test both plate ends in the actual open bay. Take account of floor mats or a platform, which raise the lifter and may reduce the remaining overhead room. Measure after the intended flooring is in place, or subtract its planned thickness.
Also test getting the bar down the stairs and around landings. Compare its normal carrying length with any shipping tube if stairs are the only route. The unpacking location can change whether the package fits through a turn. Use a second person where needed for handling and keep the route clear of obstacles.
Solve sleeve, flooring, and storage constraints together
A smaller footprint can transfer a problem from the room into the equipment. Shorter sleeves can force a new plate mix, and extra plate storage can take back the floor space you saved. Evaluate your current plates, the planned progression, and the storage location at the same time before settling on the bar length.
Measure plates and the collar as one installed stack
Put together the plates you use most often on one side and measure their total thickness. Add the length your collar needs to be fully engaged. Then check the usable sleeve length for the exact model. Measure a planned heavier set as well, especially if you expect multiple broad bumpers on the same sleeve.
A 72-inch bar with a nine-inch sleeve and a different 72-inch bar with an 11-inch sleeve may look equally suitable for the room. The longer sleeve takes more of its length from the center section, so the rack implications can differ. Compare both the shoulder span and sleeve room whenever changing products to accommodate more plates.
A dense iron plate can make a heavy stack thinner. If you use bumpers to preserve a specific starting height or handle floor contact, check what your plate and bar manufacturers permit before mixing types. Keep both sides balanced. Weigh or verify unfamiliar plates when combining sets where small increments or consistent work are important.
Locate low, secure storage for plates and the empty bar
Compact bar storage works best when you can put equipment away without crossing the lift zone repeatedly. A secure holder for the empty bar can free floor space. A plate stand or rack horn close to the working area can reduce carrying distance, provided the stored plates leave enough clearance to load and lift.
For vertical storage, measure the ceiling height and the extra space needed to lift the bar clear of its retaining tube or holder. A shorter bar can fit under a ceiling while still taking too much clearance to extract. Horizontal storage can work where walls are long and mounting is appropriate. Check the specific holder’s allowed mounting and weight.
Keep storage choices tied to daily use. If you remove two plates per side for several warm-up sets, avoid a setup in which heavy plates have to be moved farther away each time. A small change in storage layout can reduce the effective effort of training more than a large change in the purchase price.
Create a room layout that can be reset after training
Mark the safe position of the bench or floor setup using removable guides if they suit your flooring. Keep regularly used plates in a repeatable order so you can load each side symmetrically. Set aside room for collars and change plates close enough that you can reach them without stepping over equipment or behind a loaded bar.
A garage can also use a consistent end-of-session arrangement. Put the unloaded bar in its holder, return plates to their storage positions, and bring the bench back to its parking spot before restoring the room to other uses. Move a vehicle or large stored item only after the lifting area is clear. This makes your next session start with a familiar layout.
If you need to dismantle or rearrange most of the gym every time, compare the resulting setup time with a smaller equipment plan. A compact straight bar still benefits from keeping its loading space ready. Plan around the routine you will actually follow on a busy weekday.
Questions about a short Olympic barbell for small spaces
A good room plan accounts for the open space to lift and for everyday handling. These questions address common surprises when the rack, bar, and plates already look as though they will fit on paper, including a short bar that fits the room yet needs additional room during loading or an overhead press.
How much room should I leave at each end?
There is no single measurement that covers every plate, room, and loading approach. Start with the space remaining beyond each tip, then test using the largest plate you expect and the collar. Consider your grip on the plate, where you stand, and how you control it around the nearest obstacle in the actual room.
If your 72-inch bar sits in a 96-inch opening, the nominal gap is 12 inches per side when centered. A wall shelf, an angled loading approach, or a plate holder can reduce what you can use. Run the mock-up at squat height and floor height if you work at both levels.
Can I move the bar closer to one wall?
An offset setup may free space on one side while taking it from the other. That can work if each end remains accessible, the rack stays in a suitable position, and the lifter can move freely through the whole exercise. Measure the close side first because its clearance sets the limit for an offset layout.
If you load a wall-side sleeve from the front, confirm that the full plate clears the bar end and that you can control it comfortably. Keep the bench centered where needed and make sure the rack manufacturer allows the chosen layout, mounting, or anchoring arrangement.
Is a five-foot bar enough for an entire home gym?
It can cover floor lifts and some standing work when the working grip and sleeve room match the program. For conventional rack squats and bench presses, many five-foot designs have too little space between sleeve shoulders to sit properly on typical supports. Use the exact shaft span in that decision.
Write down the first lift a five-foot bar would prevent. A floor press can work if it fits your routine and you can set it up appropriately, but it is a different movement from your programmed bench press. If keeping bench and squat mechanics matters most, start with a short rackable design.
Conclusion
Choose a short Olympic barbell for small spaces by measuring the room at lifting height, keeping the plate-loading path clear at both ends, and confirming usable sleeve length with the plates you own. A rack-oriented short bar serves a compact bench and squat setup. A shorter floor bar gives you more room to move when your lifts start from the ground.
More from Amazon
Programs that pair well with the guide above. Offers and eligibility are set by Amazon and may change.
Free shipping on eligible items, Prime Video and more. Eligible new members can start with a free trial.
Start a Prime free trialA Prime membership for ages 18-24 with a trial period. Eligibility is set by Amazon.
See Prime for Young AdultsAudiobooks and podcasts to listen to on the go. Eligible new members can start with a free trial.
Try Audible freeAd-free music streaming. Eligible new subscribers can start with a free trial.
Try Music Unlimited freeAs an Amazon Associate we earn from qualifying purchases.









Write Your Review
No reviews yet. Be the first to share your experience!