
This short Olympic barbell buying guide helps you match a compact bar to your rack, your working loads, and the people who will use it. You will learn to check shoulder spacing, calculate usable sleeve capacity, and decide how much grip, rotation, and finish matter for the training you do most often at home.
Start this short Olympic barbell buying guide with fit
Identify the lift that depends most on the bar before choosing a length. Squats and bench presses require a suitable rack span and enough room to unrack the bar. Floor pulls give you more freedom to choose a shorter shaft. Lighter starting loads and a specific grip size can also drive the purchase for a shared gym.
Read an Olympic bar listing in the right order
Find the sleeve interface first, then shoulder spacing, overall length, and loadable sleeve length. Follow those dimensions with bare weight and shaft diameter. This order establishes whether the bar fits your plates and rack before you compare finishes, knurl patterns, spin, and other features that affect training feel.
“Olympic” commonly identifies compatibility with nominal two-inch plates in the home gym market. A bar can have Olympic sleeves and come in a shorter length with a lighter empty weight than a full-size weightlifting bar. The same catalog can include a five-foot Olympic bar and a five-foot standard bar that uses a different plate interface. Match your equipment to the full model code.
Find a technical drawing when one is available. “Grip length,” “shaft length,” and “distance between collars” can be used differently across listings. The measurement you need for a rack is the usable clear span between the inner faces of the sleeve shoulders. The length of the knurled sections alone does not determine where a J-cup can support the shaft.
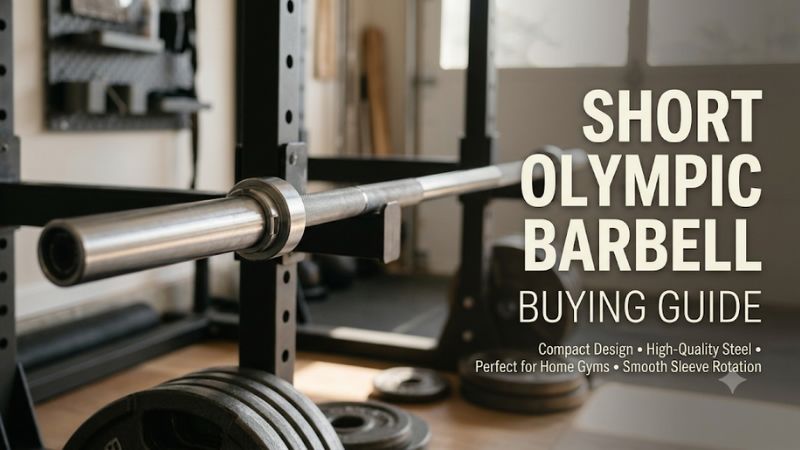
Verify the distance between the J-cups and shoulders
Measure across the outside edges that face the sleeve shoulders, with the hooks installed in the positions you train in. Ask the maker for the bar’s clearance between the inner shoulder faces and confirm compatibility. Leave practical side room for the way you guide the empty bar into and out of the supports.
A 72-inch rack-oriented bar might give 51.5 inches between shoulders. Another 72-inch bar might give just 46 inches. If your supports span 49 inches across their outside edges, the two designs have very different results. The first offers a nominal 2.5 inches of total difference before considering cup and shoulder shape. The second is three inches short of the support span. The sleeve type and bar length alone cannot resolve that difference.
Confirm where your safeties sit as well. Straps, pins, and spotter arms take up space and can have edges or sleeves at different points from the cups. After verifying dimensions, check the complete range with the empty bar in the manufacturer-approved setup, including where your hands land and how the bar returns to the hooks.
Decide how much overall length to trade away
A six-foot compact bar can preserve a near-full shaft width with less space at either end. A five-foot design often saves more space by reducing the shaft span. Compare the resulting sleeve room and hand positions on your most-used lift. A shorter overall length pays off when it frees space you actually need to use.
A room with furniture close to only one end may benefit from a reduction of six to fifteen inches overall, depending on the alternatives. Test at the height of the exercise and simulate sliding on the largest plate. If an 86.6-inch bar has plenty of access, shortening it may give up sleeve capacity for little benefit. If an 86.6-inch bar leaves you unable to stand near one end, a 72-inch bar may solve the layout.
For frequent transport, measure the turns between the lifting area and storage. A shorter bar is easier to maneuver only if axes of movement, grip location, and carry weight are manageable. The total package can be longer than the bar, so account for delivery and the location where you will open it if the gym is upstairs or in a basement.
Calculate usable sleeve capacity with your own plates
Sleeve space sets a physical limit on your setup. Start with a stack you own and the collar you intend to use. Calculate the maximum stack per side for current work and planned progression. Then separately check the manufacturer’s limits on loaded weight and the kinds of lifting for which the bar is designed.
Build a sleeve-length calculation on one side
List the intended plates for one sleeve and add their physical thicknesses. Add the collar’s required engagement and account for any unusable ends or shoulders. When the total reaches the listed sleeve length, verify exactly where the flat loading surface ends before relying on the combination for training.
For example, two hypothetical plates measuring 2.4 inches thick each use 4.8 inches, a third plate measuring 1.6 inches takes that to 6.4, and a collar requiring 1.5 inches brings the combined length to 7.9 inches. On a 7⅞-inch sleeve, you are slightly over already. An 8.9-inch sleeve offers about one inch of nominal space in this example if the manufacturer’s listed measure is fully usable. Include a change plate in the calculation if your regular sets use one.
Small differences add up across multiple plates. If you replace one 2.4-inch plate with a 1.2-inch equivalent that suits your lifting method, you save 1.2 inches per side. Check the outer diameter, material, and use instructions of the new plate as well as its thickness. A swap that works on a rack may change where the bar starts on the floor.
Confirm what the advertised load rating describes
Manufacturers can publish a load limit, a steel tensile-strength number, and other test figures on the same page. These describe different properties. Use the intended training guidance and the stated bar limit, and check the rack and other equipment limits separately if the bar will be used with those components.
Tensile strength describes a material property. It does not tell you the usable sleeve length, the impact conditions the entire assembled bar can handle, or how a specific component will respond in an unintended exercise. Ask about approved lifting and lowering practices if you plan dynamic lifts. Work within the stated limits for every part of the setup.
A heavy load can also be hard to fit long before you approach a catalog number. The bar you choose should have room for the heaviest and thickest working combination in your program. This test is especially important when moving from full-length sleeves to compact sleeves while keeping broad plates and wide collars.
Keep your training log accurate with a different empty weight
A compact bar can start at 10 kg, 15 kg, or an imperial weight in pounds, depending on the model. Check the empty mass rather than relying on appearance or usual gym convention. An accurate starting figure lets you set up warm-ups, compare past sessions, and account for small increases across different exercises.
A 15 kg bar weighs about 33.1 pounds. With one 45-pound plate per sleeve, it weighs about 123.1 pounds before collars. A 20 kg bar with the same plates is about 134.1 pounds. The difference is roughly 11 pounds even though the plate count looks identical. If you log all loads in kilograms, convert the plates and collars consistently or use a common plate system.
A lighter starting bar helps when a 20 kg empty bar is already too heavy for a planned practice set. For intermediate and heavier work, a different starting mass is manageable once the training log and plate combinations account for it. If you need to reproduce standardized lifts using prescribed equipment, compare the training bar’s geometry with what you will encounter.
Evaluate shaft diameter, knurling, and rotation
After the bar fits your rack and plates, consider how it will feel in your hands and move during a lift. Shaft diameter changes the grip around the bar. Knurling influences hand contact and bar placement. The sleeve assembly affects rotation. Rank these factors by how often the bar performs each kind of training.
Match the shaft diameter to the grip you use most
A 25 mm shaft can suit smaller hands and a lighter training bar. A 28 to 28.5 mm shaft is common among compact general-purpose options. A 30 mm example gives a different hand feel and may appeal to someone who prefers a thicker bar. Compare those sizes using the same hand position and the lift you perform most often.
A slightly thicker shaft can feel more comfortable across the palm for some pressers and harder to hold during pulling for others. Grip effectiveness also depends on surface texture, moisture, and hand length. If a local gym has bars of different shaft sizes, compare what you like at light loads and note the exact diameter. That gives you a better reference than a generic “comfortable grip” description.
Record where your hands land relative to the markings. A slim shaft and short overall length can still provide a wide grip on a rackable bar. A thick but narrow floor bar can constrain hand position. Choose based on the usable hand space as well as the size of the shaft.
Choose a knurl pattern that suits the main exercises
Knurl texture, grip-ring location, and center texture can each matter. A clear set of marks helps you reproduce grip width. Medium texture can work well in a home gym where several people share one bar. Center texture interacts with the area where the bar contacts clothing or skin on some bar positions and movements.
For back squats, someone who likes additional contact on the shirt may seek center knurling. A lifter training cleans or front racks may prefer a smooth center. Coatings can also influence how pronounced the machined texture feels. Manufacturer language such as “medium” helps within a line and may compare poorly between two brands using different patterns.
Check close photos or the current manufacturer’s description if this matters. Two bars with similar finish names can have different texture, and a product listing can show older pictures alongside current copy. Ask for the current SKU when the photos and written specs conflict.
Choose sleeve rotation according to your training
Bushings and bearings both allow the sleeves to rotate relative to the shaft. The feel depends on the whole assembly and the exercise. Controlled bench presses, squats, and general pulling often work well with a sound bushing design. A buyer practicing faster turnover may put more emphasis on smooth loaded rotation.
A spin test with an unloaded sleeve can tell you whether a sleeve turns, but it has limited value for judging how the complete bar behaves with plates and a changing grip under load. Look for documented purpose, maintenance terms, and the maker’s intended training use. If you plan to train with dynamic movements, check the instructions on drops, flooring, and compatible plates separately.
Noise can matter if you lift near other people. Sleeve grooves, plate inserts, collars, and how quickly you slide plates on all influence sound. A quieter rotation assembly alone cannot tell you what the bar will sound like in your room. Where noise is important, keep those other contact points in your comparison.
Check construction, warranty, and the final purchase
Product photos can show an attractive finish with little information about daily handling. Check what covers the shaft and sleeves, how the seller handles shipping damage, and what the warranty covers for your intended use. Then record the small set of dimensions and terms you will rely on when making the final purchase.
Review the shaft and sleeve finishes separately
A listing often gives one headline finish even when it uses different materials or coatings on the shaft and sleeves. Your hands contact the shaft, and plate inserts contact the sleeves. Compare the surfaces separately, since they affect grip feel and upkeep in different ways, particularly in a damp garage or basement.
A coated shaft may feel different from exposed or plated steel with the same underlying cut. A sleeve can develop marks as inserts slide over it. Treat grip feel, care instructions, and signs of damage as separate considerations. Read the manufacturer’s cleaning directions before using a harsh cleaner that could affect the finish or the sleeve internals.
If the bar will stay in a humid room, consider where it sits between sessions and how easy it is to wipe down. A dry holder and a repeatable care routine can make more difference to surface condition than comparing finishes in the abstract. Follow instructions for the finish you actually buy.
Ask questions that make the warranty useful
Use the model number to locate the current warranty and return policy. Check how the bar seller treats finish damage, manufacturing defects, damage from drops, bent shafts, and freight returns. The answers matter more when a short bar has to clear a rack or fit a plate stack with only a small amount of spare space.
For online purchases, a wrong fit and a faulty item may have different return terms. Ask who covers shipping if a dimension from the listing turns out to be incorrect. Find out what evidence you will need to provide for shipping damage or a sleeve that binds. Keep the packaging until you have confirmed dimensions and inspected the bar.
If buying a used bar, check whether warranty coverage follows the product or the original buyer. Ask for model identification rather than relying on the look of an end cap. If the warranty cannot be verified, price the equipment on its condition and your ability to confirm fit in person.
Use a short pre-order and arrival checklist
Before ordering, write down the model code, overall length, clear shaft span, loadable sleeve length, empty weight, shaft diameter, and plate compatibility. Confirm your outside support span and the thickness of your working stack plus collar. Put the weights and sizes in one unit system to make errors easier to spot.
On arrival, inspect packaging and check the shaft, sleeves, and assembly for visible damage. Match the measured dimensions to the exact model you purchased and confirm plates slide on as expected. Confirm the collar engages fully without running out of usable sleeve. Where the manufacturer supports your rack configuration, check fit and movement empty before adding load.
If there is a meaningful discrepancy, photograph the measurement with the bar unloaded and raise it with the seller promptly. Clear photos of the model mark, the inside shoulder span, and any damage can make a return more straightforward. Use the published instructions to distinguish expected finish marks from a defect that affects safe use.
Use this short Olympic barbell buying guide checklist
Reduce the final choice to the setup you will use most. Give one column to requirements that must be satisfied, such as rack width and loadable sleeve length. Then compare preferences such as grip texture, finish, price, and sleeve rotation among the models that pass those requirements for your own equipment.
| Item | What to verify | Reason it can change your choice |
|---|---|---|
| Main lift | Rack squat, bench, floor pull, or light training | Determines which geometry to prioritize |
| Rack fit | Actual outer J-cup span and bar shoulder clearance | Decides whether the bar can rest and move on the rack |
| Sleeve fit | Plate-hole type and stack width plus collar | Sets your usable load combinations |
| Room fit | Clear space beyond both ends at working height | Determines whether you can load plates |
| Starting load | Empty weight in your logging units | Affects warm-ups, progressions, and shared use |
| Grip details | Diameter, knurling, marks, and center texture | Affects the lifts you perform frequently |
| Seller terms | Warranty, fit claims, and returns | Defines options if a bar arrives damaged or does not fit |
If two candidates work, choose based on the next real constraint. A rack used by several people may benefit from the lighter bar. A room full of thick bumpers may reward another inch of sleeve. If both models let you use every planned plate combination, price, warranty, and availability can settle the tie without compromising the setup.
Conclusion
Use this short Olympic barbell buying guide to select a bar that fits your rack or floor layout, holds the intended plate stack with room for collars, and starts at a weight you can train with. Once those requirements are met, choose the grip, finish, rotation, and purchase terms that match how you lift and store the bar.
More from Amazon
Programs that pair well with the guide above. Offers and eligibility are set by Amazon and may change.
Free shipping on eligible items, Prime Video and more. Eligible new members can start with a free trial.
Start a Prime free trialA Prime membership for ages 18-24 with a trial period. Eligibility is set by Amazon.
See Prime for Young AdultsAudiobooks and podcasts to listen to on the go. Eligible new members can start with a free trial.
Try Audible freeAd-free music streaming. Eligible new subscribers can start with a free trial.
Try Music Unlimited freeAs an Amazon Associate we earn from qualifying purchases.








Write Your Review
No reviews yet. Be the first to share your experience!