
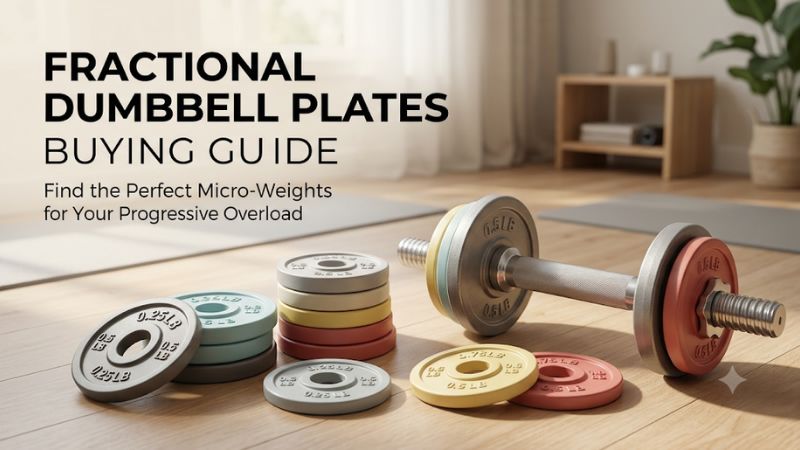
This fractional dumbbell plates buying guide starts with the next weight you want to lift. From there, you can work backward to the plate size, attachment, and number of pieces your setup needs. Check how the plate sits on the dumbbell and whether you can use the same configuration for both hands in a set.
Calculate the increase you want per hand
Write down the weight of one complete dumbbell, the next available setting, and the load you want in between. Fractional plates usually list their weight per piece. What you feel during a set is the sum of the pieces installed on one handle, which can be twice the number printed on each plate.
Find the gap your current setup leaves
If you use 20-pound dumbbells and your next pair is 25 pounds, the gap is 5 pounds per hand. A midpoint is 22.5 pounds. On a two-sleeve handle that takes an equal plate on each end, two 1.25-pound plates make that step. Four matching plates equip two dumbbells with the same increase in weight.
On a loadable handle, weigh or calculate the complete assembly first. Add the handle, existing weight plates, and collars. The left and right dumbbell should use the same configuration for exercises that call for equal working weights. Two empty handles described by the same nominal size can have different masses when they come from different sets. Use assembled weight when exact progression is important to you.
For small jumps, choose the target before you shop. A buyer looking to go from 10 pounds to 10.5 pounds needs a compatible way to add 0.5 pound to each handle. Purchasing a package of 1.25-pound discs just because it is labeled “micro” would produce a larger change. Read your workout log for the places where the next available load most often breaks your usual rep range.
The calculation can also tell you whether you need plate sizes that combine. If your eventual progression is 20, 20.5, 21, and 22 pounds, a set of 0.25-pound pieces can make the first increase on matched ends. It may take a separate set or enough pieces to make additional changes while still allowing the collars to seat. Decide how much of that progression you need now.
Choose a jump that fits the exercise
The same increase changes a light and heavy dumbbell by different proportions. Half a pound is a 5 percent increase at 10 pounds and about 1 percent at 50 pounds. That arithmetic helps explain why a small disc can be useful for a light raise and barely noticeable on a heavy row.
Compare the reps you can complete at each load under similar conditions. A jump is more useful when you can still perform your intended range of movement and work within your chosen rep bracket. If you go from an easy 12 reps to a handful of altered reps, the gap may be too large for that exercise on that day. A smaller step can give you room to practice with the new load.
Use percentages as a practical comparison between the loads you already train. A 2.5-pound addition moves a 10-pound dumbbell to 12.5 pounds and a 50-pound dumbbell to 52.5 pounds. Those are 25 percent and 5 percent increases. The exact step still depends on your performance and your plan for the exercise. A ready-made gap between fixed pairs is a starting point for the calculation.
Read the plate weight and the package weight separately
A listing can describe a plate by its own mass, the mass of two pieces, or the combined weight of a mixed kit. Identify the actual weight printed on an individual piece. Then count how many of that exact size are in the box and where the maker expects you to install each one.
For example, a product described as a “2.5 lb pair” could mean two 1.25-pound plates that together weigh 2.5 pounds. It could also mean a pair of 2.5-pound plates, each making a different change on a sleeve. Read the variant description and the pieces included to resolve the difference. If you are comparing pictures between listings, look at the weight stamped on the individual disk.
Pounds and kilograms can look interchangeable in a condensed product title. A 0.5 kg plate weighs roughly 1.10 pounds, so two add roughly 2.20 pounds to one dumbbell. Two 0.5-pound plates add 1 pound. The package photo may be nearly identical. Pick one unit for your workout log and convert the weights before you put together a matched setup.
The same counting logic applies to a kit with four sizes. If it includes a pair of each size, it can fill both sleeves on one dumbbell at any of those weights. Equipping two dumbbells with the same increase may require a second set or a package with four plates of the one size you want. This is the cheapest time to catch a mismatch.
Choose an attachment that fits the dumbbell you own
Identify the mounting point before you compare materials, coatings, and prices. A disk with a center hole belongs on a loadable sleeve. A grip clamp needs clear space on the right shape of handle. A magnetic end attachment and a dedicated adjustable-system add-on each have their own fit checks.
Standard or Olympic plates for loadable handles
Nominal one-inch standard and two-inch Olympic sleeves are different size families. Confirm the designation for your exact handle, then check the listed opening on the plate. The plate needs to slide into position and stay in place with the collar or spinlock engaged according to the handle instructions.
Find the measurement at both ends of the handle. The usable space starts at the inner stop and extends through the area where the plate can sit flat and the collar can seat. Measure what is left after assembling your biggest regular stack. For threaded handles, include the required amount of thread for the spinlock. For smooth handles, give the collar the full landing surface required by its design.
Outside diameter can make a plate unsuitable even when the bore and thickness match. On dumbbells, your arm, leg, and bench are often closer to the outer edge than they are on a barbell. Compare the disc’s diameter with the largest plate already in your stack. A smaller add-on can fit inside the current outline. A larger one may change how your hand or the dumbbell clears your body.
Before the first loaded set, confirm that the plates sit flat against the stack and the collar remains fully engaged. Some plates are advertised for Olympic barbells, but the features that determine dumbbell use are the dimensional fit, movement clearance, and ability to secure the load in the approved configuration. A compatible bore is only one of those checks.
Handle clips for a usable section of exposed grip
A fixed dumbbell with an exposed grip may take a clamp or clip designed for that surface. That fits some rubber-head designs because the plate attaches to the grip. The shape and available width matter whether the handle is smooth, knurled, tapered, or wider at the middle than at the ends.
Compare the required placement with where your hand naturally rests. Some designs use space near the ends of the grip, and other designs may call for a different position. If your palm or fingers have to move to install the accessory, check the amount of room left for a stable grip before training. This matters more on a narrow handle or on a movement where the dumbbell turns in your hand.
Also look at the clip’s projection. A disc can take only a small fraction of an inch along the handle and still project several inches out from the shaft. Look at the area around your wrists, the ends of the dumbbell, and the path as you turn it. Install the specified number of clips in the approved positions. Stop and recheck if a clip shifts or the installation feels loose.
A clip compatible with a fixed dumbbell is not automatically suitable for an adjustable dumbbell with a handle inside a cage or cradle. Confirm any limitations from the dumbbell maker and the accessory maker. You want to preserve normal selector and docking operation as well as a comfortable grip.
Magnetic end adders for confirmed metal surfaces
Magnetic adders need the type of direct contact specified by their maker. Flat, exposed iron faces can make a compatible mounting point, while a rubber layer, a raised logo, or a recessed face can interrupt it. For a particular magnet, check the dumbbell size, contact area, placement, and exercise limits.
Start by identifying the real intended face. A rubber-coated dumbbell can have an iron core and an exposed handle while still lacking a compatible exposed end. An accessory designed to mount around the inside of the handle is a separate design with its own instructions and dimensions. Match the mechanism to the actual surfaces before you order.
End-mounted products add length and place the extra weight away from the hand. The movement may feel different if the added weight changes where the ends pass during a lift. Use the maker’s required arrangement. Some products call for one attachment at each end and explicitly prohibit stacking. That determines the weight per hand and number of pieces to buy.
Check what the instructions say about handling, swinging, dropping, and storage. A magnet holding in a static fit check does not establish that it is approved for a particular exercise. Read and use the accessory within the stated conditions. Where the maker is silent about the movement or the mounting configuration you intend, confirm it or choose a different setup.
Model-specific adders for adjustable dumbbells
Check the exact model and generation before buying a product that uses a selectorized handle, accessory slot, or integrated weight chamber. Versions that share the same brand name can differ in placement and geometry. A part that fits one model can interfere with a different handle’s cradle or adjustment system.
Look for an official parts list or a written compatibility statement from the accessory maker. If the accessory is third party, confirm the intended slot, the allowed configuration, and what that maker says about simultaneous use with the original accessories. Some two-piece configurations use the same slots as the equipment’s factory adders, which prevents mixing them in the same setup.
Calculate the resulting options in a simple sequence. If the device is set to 30 pounds and an approved matched setup adds 2.5 pounds, record 32.5 as a new usable setting. If the next stock weight is 35, you have solved one gap. If a separate 5-pound stock adder already produces the setting you want, buy additional equipment only if it opens a different usable load.
The accessory should leave the selector, lock, rails, and cradle operating normally. Verify whether the adders should come off before changing a setting or docking. For a fast series of workouts, the approved attachment that takes less time to reset may be more helpful than an accessory that gives extra increments you rarely lift.
Use this fractional dumbbell plates buying guide at checkout
Put your desired increase, attachment type, measurements, and piece count together before choosing a listing. If any of those fields remains uncertain, resolve it on the exact product page or with the manufacturer. A complete buying decision is one you can reproduce on both dumbbells when the package arrives.
Calculate how many matching pieces to buy
Start with the number of dumbbells you need at once. In a typical two-sleeve setup, one matched plate sits on each end. One dumbbell uses two pieces and two dumbbells use four. For a clip, magnet, or dedicated system, count pieces from the installation directions rather than applying the sleeve rule.
| Intended setup | Plates needed | Increase on each dumbbell |
|---|---|---|
| One dumbbell, 0.25 lb on each sleeve | 2 | 0.5 lb |
| Two dumbbells, 0.25 lb on each sleeve | 4 | 0.5 lb |
| Two dumbbells, 0.5 lb on each sleeve | 4 | 1 lb |
| Two dumbbells, 1.25 lb on each sleeve | 4 | 2.5 lb |
Compare four singles with two pairs or a four-piece pack. A lower listed price for mixed sizes can cost more if you need to buy a second package for the same increase on each hand. If you only train one arm at a time, two pieces can serve one handle. Factor in any setup changes if you alternate exercises or share equipment.
If a pack contains enough pieces for more than one possible setting, map them to the settings before buying. Two accessories might deliver the same increase at first but differ in how many higher settings they can make later. Preserve balance and the accessory maker’s limits in that calculation. A possible number on paper still needs an approved physical arrangement.
Confirm the first installation and log the total
Inspect the accessories when they arrive. Match the markings on each piece and confirm that the surfaces, clips, or collars seat as shown in the instructions. Start with a light configuration and adequate clearance. Check the complete dumbbell weight and the positions of all attachments before using it for a working set.
For loadable sleeves, look for a flat stack and full collar engagement. For other attachment designs, check the specified mounting points and that the hardware seats correctly. With selectorized designs, verify that the selector and cradle operate normally through the steps required by the manufacturer. If an attachment shifts, interferes with a moving part, or fails to seat, stop using that configuration and recheck compatibility.
Record the load per dumbbell in your workout log. For example, record “22.5 lb each, +1.25 lb per sleeve” if you use two equal discs on each handle. That note helps you repeat the same setup and separates the new working weight from the amount in the original pack. If your logged weights come from different systems, put the unit beside the number so a metric plate does not create a hidden jump.
Check when to add another fractional size
Use a first set long enough to find out where it helps. If it frequently bridges a gap on one movement but leaves another exercise without a useful intermediate weight, a second size may be worth buying. That decision is best made after you know the first plate fits your equipment and your routine.
For instance, two 0.25-pound plates per dumbbell give you a half-pound increase. If you soon want a full pound per hand, use an approved arrangement with equal changes on each side and enough room for the collars. A specific 0.5-pound disc may be easier to manage than adding more 0.25-pound pieces to a short sleeve. In an adjustable system, follow the brand’s compatibility rules for the adders and positions.
Consider how often you actually need two sizes in the same session. If each size earns a recurring spot in the program, buying both gives you more ways to progress on the same handles. If the other size would sit in a drawer most weeks, the money may go further toward an essential plate pair, an appropriate collar, or another piece of equipment you use every time.
Conclusion
Choose the next weight you want per hand, divide that increase across the approved attachment points, and count the matching pieces for both dumbbells. Confirm the sleeve, grip, or model-specific fit before checkout. Those checks give you a fractional setup you can secure correctly, reproduce, and track in your training.
More from Amazon
Programs that pair well with the guide above. Offers and eligibility are set by Amazon and may change.
Free shipping on eligible items, Prime Video and more. Eligible new members can start with a free trial.
Start a Prime free trialA Prime membership for ages 18-24 with a trial period. Eligibility is set by Amazon.
See Prime for Young AdultsAudiobooks and podcasts to listen to on the go. Eligible new members can start with a free trial.
Try Audible freeAd-free music streaming. Eligible new subscribers can start with a free trial.
Try Music Unlimited freeAs an Amazon Associate we earn from qualifying purchases.








Write Your Review
No reviews yet. Be the first to share your experience!