
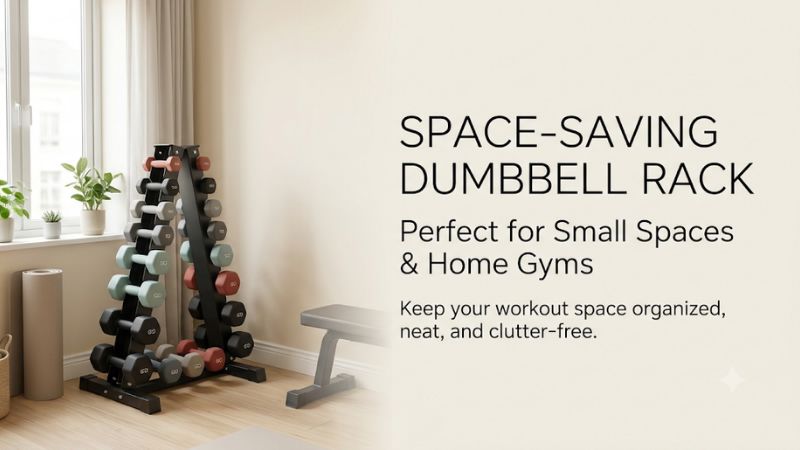
A dumbbell rack for small spaces should fit both the weights and the way you approach them. Measure the loaded footprint and leave room to lift each bell clear. A narrow A-frame works for compatible light pairs, while a short horizontal rack can be easier to use against a wall or beside a workout bench.
Start with the space the rack will actually use
A small rack can take up more room in use than its bare dimensions suggest. The dumbbells may extend beyond the frame, your hands need clearance around the heads, and your feet need a stable place to stand. Measure storage, retrieval, and exercise space separately before choosing a location for the rack.
Draw the loaded footprint on the floor
Mark the rack’s outside width and depth with removable tape. Add any expected projection from dumbbell heads, feet, or rails. A frame set tight against a wall may need additional room if the weight extends backward or the baseboard pushes the feet forward. Start with the largest bell that will sit on it.
The CAP RK-12B illustrates the difference. A retailer lists its base at 15 by 13 in and its height at 26 in. That tells you where the rack itself can stand. The heads and handles can occupy a larger envelope, and your hand needs room to pull weights from their slots. A cabinet next to the frame can reduce access even when the feet fit comfortably.
For a useful layout sketch, draw the rack and the weights as seen from above. Mark the usual route into the room and trace the door swing. Open a closet or drawer that might share the rack’s space. Include any part that extends at knee or hip height, since that is where a head can collide with furniture as you leave the rack.
Check both the entry and exit of the heaviest pair
A heavy dumbbell should be possible to lift out, move clear, and return without twisting or reaching around another piece. Check the direction in which the handle comes away from the slot or shelf. Include the clearance you need to shift from the rack to the area where you begin the exercise.
Use an empty cardboard model the size of the bell to simulate the path if you have yet to buy the rack. Take it from the planned position to your bench or mat. Check how high you have to raise it over the support, where your knuckles go, and whether an upright or wall changes the angle. The mock-up helps with space planning. Check the real support fit and ratings before adding weight.
Next, reverse the movement. A rack that is easy to unload at the start of a set can be inconvenient to load after fatigue. Make sure you have a clear standing position for guiding the bell back into its slot. If lowering the bell means pulling it past the bench first, change the angle or relocate the rack.
Measure with the room in everyday use
A rack location can look good in an empty room and break down when the door opens, the bench unfolds, or a chair rolls back. Measure while these objects are in their working positions. If two people share the room, leave them a usable route past the rack while the training equipment is set out.
A bedroom can have plenty of clear floor with drawers closed and very little once you open them. In a studio, the bench can occupy the same path you use to return the weights. A garage might lose access when a vehicle is present. Write down whether the equipment must be moved before storage can be used.
Give the rack a permanent landing zone if the room changes purpose every day. Plan a clear place to set down your active pair during a workout, independent of the permanent rack. Being able to park the bells safely between exercises helps the setup work without forcing you to return them to a crowded spot before every transition.
Choose a rack layout that fits the room and weights
For a handful of compatible light weights, an A-frame can use less wall. A short horizontal rack uses more width and can make all the handles available from one side. A low cradle suits one round pair or a collection that needs little vertical storage. Compare the loaded arrangement with the way you train.
| Layout | Where it works | Check first | Where it becomes impractical |
|---|---|---|---|
| A-frame or vertical tree | Small group of compatible pairs in an accessible corner | Slot width, handle length, and access on both sides | One side sits against furniture or adjacent heads interfere |
| Short horizontal rack | Narrow section of wall with access from the front | Usable shelf span, depth, and lift-out clearance | Projecting heads or feet crowd the walking path |
| Low rated cradle | One or two round pairs with dedicated positions | Shape retention, floor protection, and hand access | Collecting more pairs creates several obstacles at floor level |
| Slim shallow frame | A room where front-to-back depth is limited | Loaded projection, width at the heaviest bell, and access | Large weights fit poorly even when the rack’s bare depth is small |
| Matched adjustable stand | Many loads housed in one compatible adjustable pair | Stand compatibility, height, and space for weight changes | Multiple people need separate fixed loads at the same time |
Use an A-frame when both sides are reachable
An A-frame saves wall length by placing weight positions up the sides of a narrow frame. Each slot has a limited opening, and the neighboring weights can narrow your hand path. Check the dimensions on several adjacent tiers, especially where smaller handles sit near wider heads and the frame narrows toward the top.
Test whether you can get to both sides while the rack is where you intend to keep it. A rack between a wall and an outward-opening cabinet may be inaccessible from one side. Turning the frame can improve access, but the new orientation changes how far the heads project into the room. Make that check before bringing it home.
A compact rack works best when it matches the weights already in the room or a planned group of specific pairs. Owning five pairs does not guarantee a fit for five slots. A short handle on a neoprene bell may sit differently from longer steel handles, and bulky round heads can interfere across levels. Compare actual dimensions and the maker’s approved sizes.
Use a short horizontal rack when you need front access
A short rack with shelves can sit against a wall while letting you approach each pair from the front. The broad arrangement makes it easier to see and group the weights and can suit larger heads. Verify the clear width inside the frame, and allow room to reach into a lower tier without hitting the one above it.
Draw a shelf plan with each row assigned weights. Positions in a horizontal rack are determined by head size and usable length rather than by a fixed slot count. A pair that appears to fit can still be pinched between a second pair and a post. Include a finger gap and check how far forward the handle must travel before it clears the retaining edge.
If you have a bench and mainly use 25 and 40 lb pairs, place the frequently used loads where you can retrieve them with little carrying. The correct position still depends on the shelf ratings and the maker’s loading instructions. A low rack beside the bench can serve if the dumbbells are accessible when the bench is inclined as well as when it lies flat.
Choose a low cradle for a small number of round pairs
Round heads need a resting surface or cradle that restrains them. A low rated cradle can give one pair a secure location without the width or height of a complete rack. It works best when the weights stay close to the training area and the user can get a direct grip without reaching into a deep opening.
A 25 lb round urethane bell from Titan is listed at 10.2 in long with a 6 in head diameter. Two heads laid side by side occupy at least 12 in across before leaving room between the dumbbells or adding a cradle. A shorter end-to-end model can still use more crosswise space than a slimmer one.
A floor-level cradle makes the first lift start low. Repeatedly retrieving a heavy pair that way can be inconvenient if your movement or room furniture makes it hard to reach. Consider how frequently you lift those weights, where they rest when you are finished, and whether a suitable low shelf would improve the setup without taking over the room.
Keep a compact stand tied to the adjustable system
Adjustable dumbbells often need a supported base when you change the load. A stand matched to the model can raise the selection point off the floor and keep the base in a stable position. Check the approved stand for the exact weight and configuration, including a heavier expansion kit if you intend to add it.
Measure the area beside the stand where you will stand to select a weight or guide both handles back onto their bases. A stand facing a bed can be easy to store and hard to operate if the usable approach is too narrow. Keep the selector movement and plate return path clear according to the equipment instructions.
If you own one adjustable pair and just one light fixed pair, the light pair may only need a dedicated low storage position. Adding a second rack can consume the space you saved by buying adjustable weights. Plan both parking spots at the same time and place the frequent light pair where it does not interfere with changing settings.
Design around three common room constraints
The right location depends on how the room is used when you are away from the rack. Put the heaviest piece in the easiest secure position, then work around door swing, furniture, and the workout area. A good small-space setup stays usable before, during, and after the session without frequent rearrangement.
Apartment living room with one normal walking route
Keep the rack off the path from the door to the main seating area. If the room doubles as a training space, park compatible light weights in an A-frame or short front-access unit close to the open floor. Use a setup where someone can walk through the room without passing behind you as you return a pair.
If the room has slick tile or resilient flooring, check the maker’s guidance for pads or mats and use a stable, compatible protector as appropriate. Protect the actual landing spot as well as the place under the rack. A relocated rack may solve the access problem, while controlled placement addresses a different issue, including sound through a shared floor.
Choose a configuration you can restore after a normal workout. A simple sequence might be return the current pair, clear the training area, and fold the bench if applicable. If workout cleanup requires moving multiple loaded pieces of furniture, the storage location will be harder to use consistently.
Bedroom with a folding bench or long storage cabinet
Measure the bench when fully open, including the positions you use for flat and inclined work. Plan where your feet will be as you carry the bells up to the bench and guide them back to the rack. The ability to tuck both items into a corner later is only part of the layout.
Near a cabinet, a horizontal rack stored against one wall may be easier to access than an A-frame that needs an approach from both sides. Leave clearance for drawer pulls, clothing, and any door that pivots into the dumbbell zone. If the closet is the storage location, measure beyond the opening, where the interior depth or floor can change.
Use a model with an accessible lower tier if you store your heaviest weights there. Set an empty box in the expected slot and practice removing it with the bench in place. If the bottom of the bench or edge of the bed catches the box, moving the rack a few inches or changing the orientation may solve the problem.
Garage bay that also holds a vehicle or utility shelves
A garage wall can offer more width but may have a sloping floor, protruding baseboards, or tool storage at the height of the upper shelf. Place the rack out of the vehicle route and choose a level position within the maker’s instructions. Confirm the approach in the room’s normal arrangement.
Keep heavy pairs close to the floor on approved positions when the rack instructions call for it. If the garage receives moisture near a door, make sure the surface under the feet remains stable and inspect hardware and contacts periodically. Clean grit out of the landing area so it does not affect placement or damage the protector.
Where you share a bay with shelves, verify the dumbbell rack keeps the equipment separate from sliding bins or doors. A long rack can fit against the wall with room to spare but obstruct the area needed to remove a container from below a workbench. Mark that path as carefully as the path you use for the weights.
Check weight limits and future room before buying
A space-saving rack still has to carry the total and any local load limits the maker specifies. Include the rack’s own mass when evaluating the location. Identify the next pair you are likely to buy and reserve a compatible position for it, particularly if larger heads would require a different tray or more room.
Calculate what the floor sees and what each shelf holds
A 10, 20, 30, and 40 lb progression contains four pairs and totals 200 lb. If the rack weighs 40 lb, the location sees 240 lb before accounting for other objects nearby. Compare storage equipment ratings with the weights, and follow building or property guidance on the complete setup if the floor’s limits are uncertain.
A rating for one shelf applies to that level under the stated conditions. A light upper tier and a heavy lower tier should still meet the maker’s placement guidance. Do not infer acceptable point loading or floor support by dividing the total by the width of the rack. Those limits come from different parts of the setup.
Reserve one usable position for the next pair
If your next purchase is a pair of 35s, check that the projected head dimensions and grip opening still work once the existing pairs are on the rack. A free slot beside narrow lighter heads can disappear when you install the bulkier pair. Confirm the arrangement with actual dimensions before assuming the rack has space to grow.
If the next two loads would fill the available wall, compare a targeted fixed collection with an adjustable pair and compatible stand. A rack that fits the current room well can still be the right choice if you plan to use those loads for a long time. Expand where the added space supports your training rather than buying a larger rack automatically.
Frequently asked questions
Small-room storage decisions usually turn on reach, head shape, and room access. The same stand can feel convenient in one corner and unusable behind a bench. Use these checks to decide whether a candidate rack will work at the heaviest weight, with the room in its normal arrangement and other equipment in place.
How much space should I leave in front of a rack?
Leave enough for a stable stance and for the heaviest dumbbell to clear its support and any overhead tier. There is no single number that works with every rack and user. Draw the footprint, clear the expected approach, and simulate the removal and return path with a lightweight object of comparable size.
Can I press an A-frame against the wall?
It depends on which directions the slots face and how far the loaded heads project. Check both sides and the lowest corners of the rack. A frame can fit near a wall if your hands can reach the bells and you can lift them clear. Reorient or move the unit if the wall closes off a position.
Is a shallow rack automatically better for a small room?
A shallow loaded setup helps when you need to preserve a walkway or bench clearance. Check the full width and projections and how you reach the lower weights. A frame with little depth may still be inconvenient if it requires room on both sides or if the dumbbells extend past the advertised footprint.
Do I need to mount the rack to the wall?
Follow the instructions for the model you buy. Some freestanding racks have a different setup from wall-mounted storage or units that require anchoring. Use approved hardware and attachment conditions when required. A wall installation should be verified for the intended load and use, especially when the supporting structure is uncertain.
Conclusion
Choose the rack that fits your loaded weights and their retrieval path. Use a compact A-frame for verified light pairs, a short horizontal rack for front access, or a rated cradle for a few round bells. Mark the loaded footprint and rehearse returning your heaviest pair before committing to the layout.
More from Amazon
Programs that pair well with the guide above. Offers and eligibility are set by Amazon and may change.
Free shipping on eligible items, Prime Video and more. Eligible new members can start with a free trial.
Start a Prime free trialA Prime membership for ages 18-24 with a trial period. Eligibility is set by Amazon.
See Prime for Young AdultsAudiobooks and podcasts to listen to on the go. Eligible new members can start with a free trial.
Try Audible freeAd-free music streaming. Eligible new subscribers can start with a free trial.
Try Music Unlimited freeAs an Amazon Associate we earn from qualifying purchases.









Write Your Review
No reviews yet. Be the first to share your experience!