
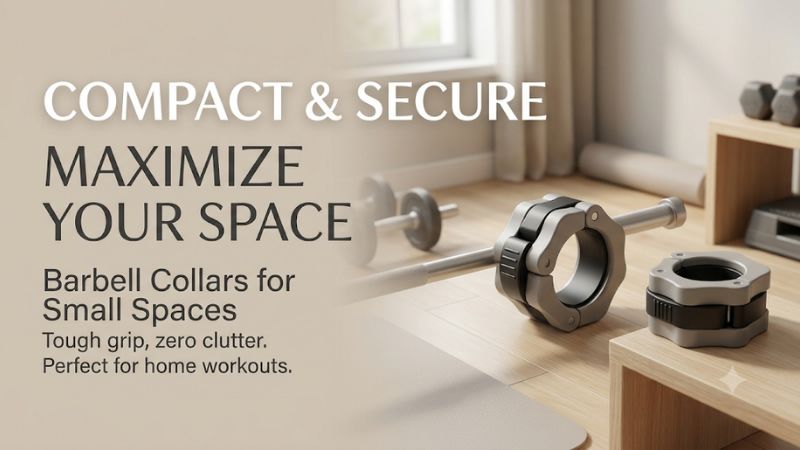
The right barbell collars for small spaces fit both the bar and the room around it. A slim collar saves space on short sleeves, while a side-loading collar can help when a wall blocks the bar tip. Check the plate stack, try the full release motion, and choose a storage spot you can reach between sets.
Measure for barbell collars for small spaces
A compact gym can put three limits on one collar. The plates can leave too little space along the sleeve, a wall can block access to the bar tip, or a bracket can leave too little room to operate the lever. Measure the bar and the room with the bench, storage, and attachments in their usual positions.
Measure the unused sleeve after the full plate stack
Set up the plates you use on one side and measure the stack from the inner shoulder to the outside of the last plate. Compare it with usable sleeve length. The remaining straight surface must support the collar as its maker directs. Include fractional plates if you use them during a normal warm-up or work set.
Suppose your bar has 8.875 inches of loadable sleeve and the plates take 7.25 inches. That leaves 1.625 inches. A 1.5-inch collar leaves an eighth of an inch in this simplified calculation. A model that occupies 1.875 inches would require a shorter plate stack or more sleeve length. In the first case, even a small change plate could make the stack too wide.
Measure actual plates together where possible. A flange or hub can affect how neighboring plates sit. If the manufacturer shows a dimension that includes the collar’s lever or overall body profile, ask how much sleeve is needed for full engagement. The important figure is the axial space the mounted collar actually requires.
Check the path beyond both sleeve tips
A closed-ring clamp usually comes onto the sleeve from beyond the tip. Measure whether you can hold the collar in that position, align it, and slide it on with your wrist and fingers comfortable. Test each side independently at bench height, squat height, and floor height if you train in all three positions.
The open end of a room may give you enough space to stand directly beside the sleeve, while the wall end may require a front approach. A small stand, bumper storage horn, or door trim can block the last part of the path. Experiment with a light mock-up before committing to a barbell or rack placement.
Separately test the approach for the largest plate. A side-loading collar can be useful when it is the final item you struggle to install, while the plates still go on from the end. If the biggest plate cannot clear the tip, you may need to move a storage item, shift the setup within its approved placement options, or choose a shorter bar. Changing the collar solves the access problem specific to the collar.
Measure the clearance around the lever or spring handles
Think of clearance around the sleeve as the room your hand and moving hardware need to close the collar. A release tab might sit just outside a plate. Spring handles may force your fingers into a space beside a rack post. Test the movement with the body fully against the plate, where it will actually be installed.
Rotate the unloaded collar to find the position that lets you operate it. Where the manufacturer permits different orientations, choose one that leaves access for release and keeps the lever clear of equipment during the lift. A squat rack with a wide safety bracket can leave different clearance at the highest and lowest positions.
Try the left and right collars rather than assuming a motion will feel the same mirrored. An easy collar to close on your dominant side can be awkward when your hand approaches from the opposite direction. A shared home gym should pass the same check for anyone who will change the plates independently.
Choose the collar design that solves the space constraint
A narrow clamp, an open-sided collar, and a magnet address different parts of the setup. Decide whether you need more room along the sleeve, a different way to reach it, or a place to put both collars between sets. A product that solves all three can be useful, but most rooms have one constraint worth addressing first.
Choose a slim clamp for a short Olympic sleeve
A slim clamp preserves more loadable sleeve for the plates. The standard Rogue OSO 2.0 is a documented 1.5-inch example. Rogue lists 1.875 inches for the HG 2.0. The difference is 0.375 inch per side, which can decide whether a thin plate fits without changing the bar or increasing the width of the training area.
Picture a compact rack bar loaded with two thick bumpers, a lighter plate, and a fractional pair. If the final plate uses the last quarter-inch of available space, changing to a slightly narrower collar may recover more usable capacity than switching to a different bar. Where a full-size weight stack leaves several spare inches, that width difference has little effect.
A slim body should still match the sleeve and fit fully on the usable part. Ask about actual engagement if the manufacturer lists only the product’s longest outside dimension. A tapered or recessed sleeve tip should be handled according to the bar and collar instructions. Keep the whole operating mechanism in a position you can reach.
Consider side loading when the bar tip is hard to reach
An open-sided design such as the Eleiko Öppen can be placed directly around the exposed mounting area beside the plates. This changes the direction from which you attach it. It can make sense when a wall-side shelf makes it awkward to slide a closed ring over the end of the bar between sets.
Check that you have a clear approach from above, below, or the side as permitted by the maker. The body and your hand must travel into that opening, and the lever must have room to close. A narrow slot between a plate and a rack post can still be too small if the access direction is blocked. Test removal as well as installation.
On a full-size Olympic sleeve with open floor around both ends, the side entry may save time without solving a layout problem. On a genuinely tight end, it can make a worthwhile difference. Verify that your empty bar and working stack provide enough mounting space before choosing the open body solely for the access advantage.
Use magnetic storage when collars are always in the way
Some collars include magnets designed to hold the pair on compatible steel between uses. In a compact garage, a repeatable place on the rack can keep them off the bench and floor. Before paying extra, identify a spot that is easy to reach and outside the path of the hooks, plates, hands, and adjustable rack hardware.
A common mistake is to put the collar on the same upright face you use to move the J-cup. Choose a different surface near the loading area. Test how securely the magnets hold on the actual finish and shape of the rack. A round surface or incompatible material may give you a poor parking point even though the gym has substantial metal equipment.
A small tray or accessory basket can solve the same storage problem for ordinary collars. Measure how far you reach while changing plates. If a tray is already just as convenient, prioritize the collar width and lever shape. Magnetic storage matters most when it clears a surface you use throughout the session.
Choose spring clips carefully when hand clearance is limited
A spring clip can be inexpensive and easy to store, but its handles need room to come together. The collar must also slide over the end of the bar. In a close corner, a short lever clamp may be easier to operate even if the spring clip is smaller when closed. Test the entire movement with your usual grip.
Spring clips can work well on an open sleeve with easy access. If you already have a pair that grips as intended, try approaching the bar from the front on the more crowded side. If your fingers swing into a plate or wall, move the loading spot or use an accessible lever design compatible with the bar.
Hand force also matters in a shared space. A clip that one person can squeeze comfortably may be inconvenient for the next person. Test the correct model beside the actual equipment. A lever that can be closed and released consistently by both people can make the routine easier than a pair that works for only one.
Set up the collars around the bar and equipment you use
A rack bar, a short floor bar, and a loadable dumbbell handle can all take Olympic-bore plates and create different collar requirements. The room you need goes beyond the bar’s overall dimensions. Test the loading height, sleeve size, and hand access for each implement you want to use with the pair.
Plan for a compact rackable bar with thick bumpers
A short rackable bar often keeps a usable shaft span for the hooks by shortening the sleeves. That can leave less room for collars even when you gain extra hand space beyond the bar tips. Run the thickest plate stack on paper before buying a narrow lock, then verify the stack and collar together on the actual bar.
For example, three hypothetical plates measuring 2.3 inches each add up to 6.9 inches. On a nine-inch sleeve, 2.1 inches remain for the collar, before any excluded area. If you later add a 0.5-inch change plate, the remaining length drops to 1.6 inches. That makes the 1.5-inch example the plausible option by width in that configuration.
Ask whether the next progression uses an extra pair of plates or a different heavier pair with similar thickness. That difference can influence your choice. If you are already at the practical limit with a slim collar, a purposeful plate swap or a bar with greater loadable sleeve length solves more than another collar purchase.
Check floor loading at the height of your actual plates
A floor setup can be harder to reach than a rack setup even when the room is the same width. The largest installed plates determine the starting height of the cylinder you work around. A bar with small iron plates may sit close to the floor and force you to approach a lever from the side or from above.
Try the collar with the bar stabilized on a suitable surface and your normal plate height. Check where the open lever points and whether your fingers clear the floor. Use a manufacturer-approved loading aid if it suits the setup and helps position the bar. Keep the necessary hardware within reach before starting bilateral loading or unloading.
If your floor routine uses a deadlift jack, blocks, or a platform, include those dimensions when planning the room. The added equipment can improve access at the sleeve while taking floor space. Confirm that the collar still fits your intended position when the bar is returned to the surface where you actually lift.
Verify a short curl bar or loadable dumbbell separately
A compact curl bar may have limited space on the end and a different sleeve design from the main Olympic bar. Loadable dumbbell handles can present an even tighter plate stack. Measure the actual mounting area on each implement and confirm the collar is suitable for the orientation and movements you intend to use.
One set of collars only works across the equipment if the relevant sleeve diameters and usable lengths match the maker’s requirements. A dumbbell may be turned through positions different from a level barbell. Use the locking hardware and training methods the implement manufacturer specifies. Give the attached collar clearance from your hands and body throughout setup.
For a threaded handle, keep the matching threaded retention system. If you have both Olympic and threaded equipment, store their collars in separate locations with the correct dimensions or model clearly identified. This saves time during workouts and makes it easier to notice when a piece of planned equipment is missing.
Fit the workflow to the room you actually have
A garage rack, a spare bedroom, and a basement corner each constrain a different step. Sketch the room at loading height with equipment in use. Check a normal sequence from warm-up plates through the heaviest planned load, then go through removal and storage. The awkward step often points to the best purchase.
One-car garage with a wall-side loading position
Start with the nearest obstruction on the tight side of the bar. It may be a pillar, shelving, a bicycle mount, or a plate storage pin. Stand where you actually load plates and verify whether you can guide the largest one onto the sleeve. Then check what room remains to attach and open the candidate collar.
If the plate passes and the collar needs a different approach, try an open-sided model in a compatible size. If the plate itself is blocked, move the storage obstruction or compare a shorter rackable bar that still handles the stack. You can also test an approved shift of the rack position. Make sure the proposed change retains space at the other end.
Park collars where they cannot be struck by the bench or bar. On a steel rack, one point for each magnetic collar can simplify busy training days. If two people share the area, make the parked positions easy to see from either side so moving or stacking plates does not hide them.
Spare bedroom with equipment put away after every workout
Aim for a repeatable storage order. Remove and store the collars, return plates securely to their designated location, and put the unloaded bar in an appropriate holder. A compact tray or holder near the storage position can keep the matching pair together. This is often simpler than leaving loose collars on furniture or the floor.
Test the route with the bench and a normal load of stored equipment in place. The distance between the sleeve and the nearest obstacle may change when you move the bench for rows. If you put the equipment away between sessions, a fixed landing spot for the collars helps you clear the room without leaving loose hardware under the bench.
If buying a separate pair for a portable kit, choose by fit and handling first. A higher-priced magnetic design may be useful if you keep it on an appropriate in-room surface, while a simple pair and a small tray can work when the gym lives in a closet between sessions.
Basement corner with limited access on one side
Measure at each exercise height, including the lowest point of a beam or a sloping stair enclosure. Mark the bar ends and the spot where you hold each plate while loading. A corner can give you adequate width in one plane and very little space for your hand to operate a collar when you stand closer to the floor.
For squat and bench work, adjust the mock collar orientation at both hook positions. If you also use an approved landmine setup in the same room, test the loaded end through its intended arc, including collar access and the route around the equipment. A collar that is easy to use on the rack can be harder to access during floor setup.
Put smaller equipment where it can be retrieved without crossing the lift zone. A low shelf near the wall can save floor area, provided it leaves room to load near the sleeve. The best storage location is often the point you can reach while keeping the rest of the area clear.
Use this barbell collars for small spaces checklist
Write down the three measurements that eliminate unsuitable options. Record the actual sleeve diameter, usable length beyond the largest plate stack, and hand clearance for the attachment action. Confirm the side nearest the wall first. Then verify the open side to make sure a layout change has preserved its loading access.
| Check | What to verify | Decision it informs |
|---|---|---|
| Sleeve diameter | Actual mounting size and maker’s stated fit | Standard Olympic, axle, or another system |
| Axial room | Flat sleeve remaining beyond the full stack | Maximum usable collar width |
| End access | Room outside the tip for the collar and hand | Slide-on or side-loading design |
| Radial access | Lever or spring motion beside plates and rack | Usable orientation and grip |
| Plate route | Approach of the largest plate at working height | Layout and bar length |
| Storage | A suitable point within reach and clear of moving parts | Magnet, tray, or holder |
Test the same layout during warm-ups and heavier work. A different number of plates can shift the collar’s operating position outward, while a different lift can put the bar near a new obstacle. Keep the final stock arrangement and collar placement in mind when you compare the next pair of plates.
Test the actual collar before beginning a loaded session
Inspect it and place it as directed on the unloaded bar. Verify that it closes and releases completely and holds on the intended section. Then check the working setup with a light, controlled load and confirm both sides are seated as the manufacturer specifies. If the mechanism is difficult to operate, recheck the fit and angle.
Keep a note of the smallest clearance you measured. That gives you a useful number when deciding whether a thicker bumper set or a larger collar will work in the same room. If you add a second bar, repeat the check before sharing the pair. Even very similar barbell setups can use different sleeve lengths or finishes.
Conclusion
Choose slim barbell collars when thick plates leave little sleeve room, an open-sided model when the bar tip is hard to reach, and magnetic storage when collars get in the way during changes. Test the plate path and locking action on both sides at your actual lifting height. The best compact setup lets you load, lock, remove, and store the pair comfortably.
More from Amazon
Programs that pair well with the guide above. Offers and eligibility are set by Amazon and may change.
Free shipping on eligible items, Prime Video and more. Eligible new members can start with a free trial.
Start a Prime free trialA Prime membership for ages 18-24 with a trial period. Eligibility is set by Amazon.
See Prime for Young AdultsAudiobooks and podcasts to listen to on the go. Eligible new members can start with a free trial.
Try Audible freeAd-free music streaming. Eligible new subscribers can start with a free trial.
Try Music Unlimited freeAs an Amazon Associate we earn from qualifying purchases.









Write Your Review
No reviews yet. Be the first to share your experience!