
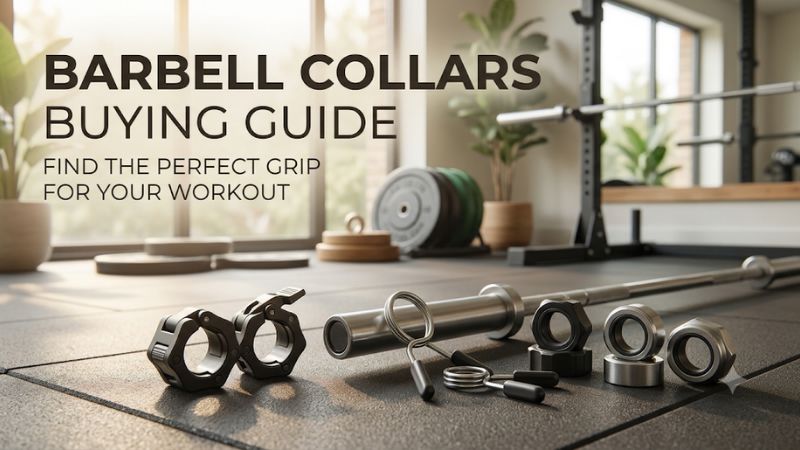
This barbell collars buying guide helps you choose a locking design that fits your equipment and loads easily. Measure the sleeve where the collar sits, then check the space left beyond your thickest plate stack. Compare spring clips, lever clamps, and specialty collars by how they work during your training.
Start this barbell collars buying guide with sleeve fit
Measure the sleeve on which the collar will clamp. A standard Olympic bar often uses a nominal 50 mm sleeve, while some specialty bars use 1.9-inch ends. Standard and threaded bars can use other interfaces. Look beyond the product title to the manufacturer’s actual fit range, intended mounting area, and locking instructions.
Measure the outside diameter in the collar mounting area
Use the bar manufacturer’s exact specification or measure the straight cylindrical area of the sleeve. A caliper is useful if two formats look similar. Measure away from the cap or any taper, and confirm the dimension where the collar will sit in a normal loaded configuration. The grip shaft is a separate measurement.
A nominal 50 mm sleeve is about 1.97 inches. A 1.9-inch specialty sleeve measures about 48.3 mm. This difference is easy to miss by eye and enough to change compatibility. A plate bore may be large enough to fit either sleeve, because it needs to slide into place. The collar must still clamp to the particular sleeve to hold the stack.
Measure both sides if you bought the bar used, see damage, or suspect replacement components. The contact area should be suitable for the design and the collar should close as intended. If there is meaningful wear, out-of-round geometry, or a burr that affects installation, resolve that condition before buying another pair based on nominal size alone.
Distinguish smooth standard bars from threaded bars
Some home-gym bars and dumbbell handles use nominal one-inch plates. The sleeve may be smooth or threaded. A smooth sleeve needs compatible retaining hardware, while a threaded handle commonly uses the maker’s specified spinlock or star collar. Confirm both the diameter and thread details if you are replacing one of those pairs.
A listing saying “one inch” may describe the sleeve size without confirming the pitch or shape of the threads. Obtain the part number or replacement compatibility from the handle manufacturer. Test that the matched fastener turns and seats properly unloaded. Stop if there is binding or a loose fit that suggests the threads differ.
Keep threaded hardware together with the implement it fits. If you have multiple bar formats, label their storage positions. The variety of collars in a garage gym can look manageable until two lifters swap equipment during a workout. A simple pairing system reduces guesswork every time the plates come off.
Check the fit range on specialty or adjustable collars
Some collars are designed for a specific sleeve diameter, while others cover a stated range. Compare both limits with your actual bar. Rogue’s Proloc 1, for example, lists 1.937 to 2.007 inches. Rogue’s OSO Axle 2.0 instead targets a 1.9-inch sleeve. Those products illustrate why the measured range matters.
The lower end of the Proloc example is larger than 1.9 inches. Its adjustability should not be assumed to cover that axle. Conversely, the OSO Axle sizing should be treated as specific to the specialty sleeve the maker describes. Compare the mounting instructions when the diameter falls right at the boundary.
Look for special requirements if the sleeve has a coating or engineered shape. A selector, end cap, or integrated retention feature can make a conventional collar inappropriate even when the diameter sounds familiar. Use the equipment manufacturer’s stated retention system where the design depends on it.
Calculate sleeve width and count the collars in your load
A collar needs enough usable surface beyond the last plate to be installed correctly. The body can also add measurable weight to the bar. Write down both figures before switching models, particularly when you use a short bar, mixed plates, or precise load increases that depend on the actual weight of the full assembly.
Add collar width to the largest working plate stack
Measure the total thickness of the plates on one side with the hub faces together. Leave enough straight sleeve to fit the collar completely as directed. Include fractional plates you already use and a realistic next load. Separately check whether the collar maker measures installed width or only publishes outside body measurements.
Say your bar offers 12.5 inches of loadable sleeve and your usual plate stack takes 10.9 inches. The remaining 1.6 inches gives a 1.5-inch collar 0.1 inch of nominal room. A 1.875-inch collar would require more sleeve or less plate thickness. If an additional microplate adds 0.2 inch, the 1.5-inch example no longer fits.
The most informative measurement is the largest practical stack you might combine with your collar, rather than the sleeve length printed in isolation. Some plates have pronounced hubs or recesses that affect combined thickness. Measure the configuration in position and follow the manufacturer’s minimum engagement requirement.
Check operating space beyond the collar’s installed width
The collar’s width says how much sleeve it occupies after installation. A lever may rotate out and a spring handle may need space for your fingers during closing. An open-sided design can enter from a different direction. Check all the clearances with the equipment at the height where you will use it most often.
On a floor pull, the ground or a lifting platform can restrict a downward opening motion. On a rack, the side of a J-cup or the end of a storage peg can make a lever difficult to reach. Turn the unloaded collar into an approved orientation and see whether it still gives you clear access beside the installed plates.
Keep this fit separate from the plate-loading path. A pair that installs from the side can help if you lack collar access beyond the tip. The plates themselves may still need clearance to slide on. Test the sequence from picking up the largest plate to releasing the collar at the end of the set.
Record pair weight if you care about small progressions
Some collars weigh a fraction of a pound and some add a meaningful load. Rogue lists the HG 2.0 at 0.85 pound per pair. Eleiko lists the Öppen at 0.50 kg per pair. A 2.5 kg competition collar contributes 5 kg across both sides. Check whether a listing gives an individual or combined weight.
For routine training, use a consistent convention in your log. If you count plates and bar only, note when a switch to a heavier collar would materially change the comparison. For a 20 kg bar with 25 kg of plates per side, an Eleiko Öppen pair makes the actual total 70.5 kg. A five-kilogram competition pair makes it 75 kg.
Where a federation or event defines the equipment, use its prescribed loading convention. The same visible plate stack can produce a different total with a heavy competition pair. For home workouts with small fractional increases, an actual pair weight gives you a cleaner progression record.
Choose a locking design for the way you train
Spring clips, lever clamps, adjustable collars, and competition collars use different motions and apply to different bar systems. Start with the simplest compatible option that you can operate consistently. Upgrade when a feature improves your working setup, such as a larger lever, smaller axial width, or easier access beside a wall.
Use spring clips where fit and grip force are comfortable
To install a typical spring clip, squeeze its handles to expand the opening, position it against the outer plate, and release it as directed. The construction is simple and the purchase cost is usually low. Evaluate how much hand force it takes and where your fingers sit while you move it across the sleeve.
A new lifter who mostly uses a home rack for controlled squats and presses may find a correctly fitted clip entirely adequate. A family member who struggles to squeeze the handles may prefer a compatible lever. If frequent changes dominate the session, compare which motion both people can perform confidently near the plates.
Inspect the handles and coil. A clip that has been stretched or bent may sit differently even if it still slides onto the bar. Replace damaged or worn parts according to the equipment maker’s instructions. Avoid adjusting a mismatched spring by bending it to fit.
Choose a lever and latch you can operate consistently
A lever clamp uses a closing action to grip the sleeve. Some designs add a spring-loaded latch or another distinct release step. Compare how the main lever closes and where the latch sits while installed. The best fit for your hands is a collar you can open and close entirely without moving the bar to gain access.
A wide lever may be welcome in an open rack because it gives you a large surface to use. In a close garage corner, the same size can make it harder to reach the release. The way the collar is installed beside a loaded plate also matters. Try the operating motion in the orientation you would actually use.
Check liner condition and seating. The material can protect contact surfaces and help the design grip as intended, but dirt or a torn insert can change the contact. Use the manufacturer’s care instructions and do not compensate for damaged hardware by forcing the lever.
Consider open-sided or magnetic collars for a specific workflow
An open-sided collar can attach around the available part of the sleeve, which can help when a shelf or wall makes the sleeve tip hard to reach. Magnetic collars can park on suitable steel when off the bar. These features address different needs, although some products combine them in the same design.
An adjustable bench setup in a shared room might benefit most from magnetic storage because two lifters change load and need an obvious place to leave the collars. A rack squeezed beside garage storage could benefit more from side placement. Measure hand access and test the relevant working height before choosing.
Check the mechanical lock separately from the magnet. Install and close the collar as the maker directs. If you plan to park the pair on a rack, use a spot where it supports the collars in a steady position and stays clear of moving equipment. An inexpensive holder nearby can also solve the storage issue.
Compare adjustable screw collars when sizes differ within range
An adjustable screw collar is worth considering if you need to use one pair across multiple sleeves that all fall within a documented range. Check how the maker instructs you to tighten it and what part of the sleeve the assembly contacts. The operating time and knob clearance can differ from a lever clamp.
A bar, specialty handle, and compact accessory may share a size range even if their shoulders and plate stacks leave different available lengths. Verify both checks for each implement. Where you frequently swap plates in a fixed rack, a lever may be simpler. In a multi-bar gym, an adjustable collar can be useful if the documented range fits.
Consider how you will inspect your setup. Read the tightening guidance and check the knob, collar body, and intended contact surface on arrival. If an implement falls outside the range, select the dedicated collar for that diameter. A screw that can move farther by hand does not expand the maker’s stated compatibility.
Choose weighted competition collars for the correct ruleset
Competition collars can be bought for sport-specific training and consistent load accounting. In IWF weightlifting, the collars are 2.5 kg each. Verify the equipment requirements for the exact event and plan the plate combinations around the actual pair mass. A lightweight home clamp fills a different role in daily use.
Competition hardware can take more sleeve room or require more handling than a simple lever clamp. Before ordering, check the physical width, fit, operating instructions, and available stack space. A lifter who wants familiar meet-day handling may find this useful on selected platform sessions. A home gym with frequent plate changes may still prefer its lighter pair for everyday workouts.
If using both types, log the total correctly and keep the weighted pair together. You can reproduce a given target load by changing the plates, but the working stack and loading routine can also change. Practice with the exact system when those details matter to your event preparation.
Inspect the pair and verify everyday use
Make the first fitting on the unloaded bar with the rack or training surface arranged normally. Check that both collars reach the intended position, close properly, and can be removed without touching a nearby obstacle. Then verify the planned plate stack and use only the compatible movement and load configurations.
Run a fit check on both sleeves
Look for any damage, dirt, loose components, or torn contact pads. Install one collar on each end and close it using the intended mechanism. Check that it seats squarely. If it feels loose or will not close, compare the model and size to the manufacturer’s specification and look for an obstruction before using it.
A pair that matches the bar on paper may still be inconvenient if a handle hits the rack. Check the planned orientation with the unloaded bar supported appropriately. After confirming the room, use a modest controlled setup to verify operation and seating, and follow your equipment’s instructions for loading and unloading.
Where you add fractional plates outside a major stack, confirm enough sleeve remains afterward. If a working set moves the collar to a different area of the sleeve, verify that contact area as well. If the collar shifts or the assembly does not operate as designed, stop and check fit and condition.
Maintain grip surfaces and replace damaged parts
Inspect the collar’s contact surface and movement periodically. Chalk, dust, coating flakes, or debris can collect on sleeves and pads. Use the maker’s cleaning instructions and confirm which parts may be replaced. On a spring model, look for changed shape or tension. On a lever collar, check closure and release.
Store collars away from points where they will be walked on or struck by moving plates. If a removable liner or plug is damaged, find the compatible part if the maker sells one. A cracked body, bent spring, or failing latch calls for replacement or evaluation by the manufacturer, even if one side of the pair still works.
Keep the two sides together and identify any model you reserve for a specialty bar. This makes a missing piece easier to notice during setup. If you add another implement, repeat the diameter and fit checks before assuming the existing pair can do both jobs.
Use this barbell collars buying guide before ordering
Start with requirements that are easy to verify. Write down the mounting diameter and intended style of retention, the space left beyond your largest plate stack, and the operating clearance you have. Once those specifications match, decide whether a latch, different collar mass, or storage magnets support your most common workouts.
| Item | What to record |
|---|---|
| Sleeve | Outside diameter where the collar mounts |
| Compatibility | Named sleeve size, thread match, or stated fit range |
| Width | Usable sleeve remaining after plates and change plates |
| Release | Finger and lever clearance at actual training height |
| Pair mass | Individual and combined weights |
| Intended use | Approved loading, movement, and lowering conditions |
| Purchase | Correct variant, number per package, delivered price, returns |
When two pairs satisfy the requirements, compare the one step you repeat most. It might be attaching clips during a shared warm-up, moving collars off the bench, or matching the load used at your club. Buy the feature that improves that step while preserving correct fit and full engagement.
Check the exact variant and pair count at checkout
A product family can include full-size Olympic, axle, magnetic, and nonmagnetic versions in similar colors. Product photos may show only one collar or list dimensions for another option in the same page. Check the actual SKU and confirm whether you receive one collar, a matched pair, or a multipack.
If the collar depends on a close axial fit, ask the seller to confirm the required sleeve length in the installed orientation. Keep that response and your measurements until the pair is verified. For a warranty or exchange, photos of the packaging and unloaded fit can help identify the issue without confusion.
Conclusion
Use this barbell collars buying guide to choose by actual sleeve size, available plate space, and access to the lock. Spring clips can serve basic compatible setups, while levers, side-loading models, and specialty collars address particular needs. Verify the exact variant and pair weight, then confirm both collars close fully on the intended mounting area.
More from Amazon
Programs that pair well with the guide above. Offers and eligibility are set by Amazon and may change.
Free shipping on eligible items, Prime Video and more. Eligible new members can start with a free trial.
Start a Prime free trialA Prime membership for ages 18-24 with a trial period. Eligibility is set by Amazon.
See Prime for Young AdultsAudiobooks and podcasts to listen to on the go. Eligible new members can start with a free trial.
Try Audible freeAd-free music streaming. Eligible new subscribers can start with a free trial.
Try Music Unlimited freeAs an Amazon Associate we earn from qualifying purchases.









Write Your Review
No reviews yet. Be the first to share your experience!