
The right rubber bumper plates for small spaces fit the bar, the storage rack, and the space you need to load and lift. Start with the weight you actually use, then measure each plate stack and both ends of the bar. A smaller plate collection can cover more loads when you add the right change plates.
Measure the room with the bar loaded
A small gym needs room to store plates, slide them onto the bar, and use the bar once it is loaded. Measure these areas independently. A weight tree can fit in a narrow gap and still need extra space to remove its largest disc. A short bar can clear the walls and still have insufficient sleeve length.
| Area | What to measure | Why it matters |
|---|---|---|
| Lifting lane | Overall bar width, loaded diameter, and space to move around it | Keeps the bar and plates clear of walls, furniture, and the bench |
| Loading area | Room beyond both sleeve ends, hand space, and a stable approach | Lets plates move onto and off the sleeve in a controlled path |
| Sleeves | Loadable length and space the collars require | Establishes how much plate thickness can fit per side |
| Storage | Peg length or slot width, largest plate diameter, and retrieval path | Determines whether every plate can be stored and removed |
| Landing area | Full position of the bar throughout the lift and return | Keeps the intended contact points on suitable flooring |
Start with the hardest loading position
Place the bar where you’ll use it for floor pulls or on the rack position where you normally load it. Check whether you can walk around both ends and hold a large plate without contacting anything. Do the same with any door, folding bench, or rack attachment in its working position.
A 450 mm disc is about 17.72 in in diameter. That tells you how much object you are handling at the end of the bar, rather than how much extra wall space every gym needs. The pickup angle, nearest obstacle, and place to set the plate down determine the usable margin.
For a long bar beside a wall, the rack may fit between two fixed surfaces while the sleeve ends leave too little room to slide a plate straight on. Tape the overall bar length and simulate a plate entering and leaving both sleeves. That simple test often reveals whether a shorter bar or a different orientation is needed.
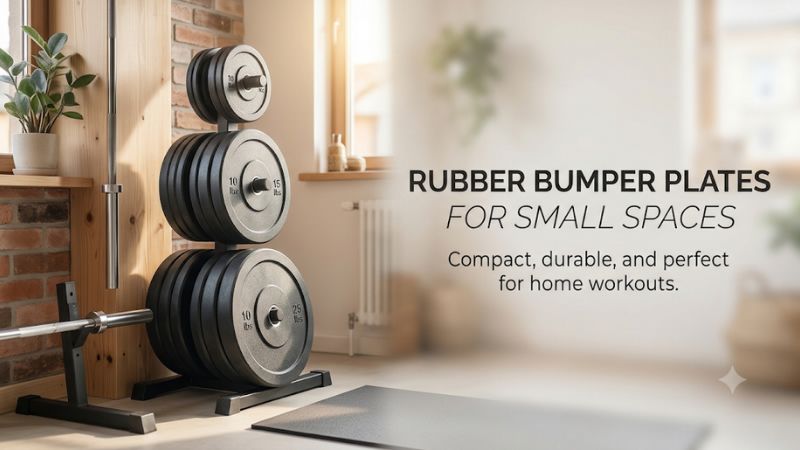
Check the loaded sleeve length separately from the bar length
A shortened bar can help where room width is tight. Some compact models get shorter by reducing their available sleeve length. Compare the actual bar specification and rackability before choosing it. A bar should work with the stand or rack as well as fit the room.
A compact sleeve requires a shorter stack. For example, if a sleeve offers 10 in and your collar needs 1.5 in of usable engagement, the remaining nominal plate space is 8.5 in. Three 2.40 in discs use 7.20 in. Three 3.75 in discs use 11.25 in and exceed the space before you add the collar. These figures are an illustration, not a universal collar allowance.
The same calculation applies at lower loads when many small plates make up the stack. Two 25s can take more room than one 45 plus a thin 5, depending on the models. Compare the planned build for your particular working weights. The target is to make useful loads fit without assuming the plate nearest the end can occupy the collar’s space.
Map the floor contact area and your walking route
Draw the expected touchdown area for both ends of the bar. A mat or platform needs to cover where the plates actually meet the floor. The storage tree should sit outside that path, together with any dumbbells or bench parts that remain in the room during the lift.
If you train with controlled set-downs, give the bar a predictable place to return. If you use permitted drops, follow the equipment and facility guidance and make sure there is space for movement after landing. A cramped area near walls or traffic is a reason to reconsider the location or the way you use it.
Check the route between the stored plates and both sleeves. A weight tree behind the bench may look compact when the room is empty. In use, you may have to carry each plate around the bench and back again. Place frequently used pairs where the shorter route stays open.
Choose the inventory before choosing a rack
The quickest way to save space is to buy the plates that create your normal working loads. A large bundle may include useful pairs for the future and unnecessary duplicates today. Write a short list of your warm-up and working weights, then build each one with the smallest sensible collection.
Start with the pair that establishes floor height
If you pull from the floor, choose a matched pair that gives you the intended starting height at a practical load. A standard-size bumper keeps a bar at a more consistent height as you change weights. The lightest pair needs to be approved for the way you use it, especially if it supports the bar by itself.
A 45 lb bar with two 25 lb bumpers starts at 95 lb before collars. That can be useful for some floor pulls and too heavy for others. A compatible lighter bar and an approved technique pair can preserve a floor start without making you lift more weight than the session calls for.
Verify the number in millimeters. A 445 mm disc places the bar center about 2.5 mm lower than a 450 mm disc on a rigid level surface. This difference is usually less important than buying a plate approved for your use, but it does explain why a larger pair on the same sleeve generally meets the floor first.
Use change plates to get more loads from fewer bumpers
Once an appropriate full-size pair establishes height, smaller compatible plates can create useful changes. A pair of 2.5 lb plates adds 5 lb total. A pair of 5 lb plates adds 10 lb. Those additions can make a compact collection cover more loads without another row of full-size discs.
Consider a buyer with a 45 lb bar, 25 and 45 lb bumper pairs, and a few small change pairs. The bare bumper builds are 95 lb, 135 lb, and 185 lb before collars, depending on which pairs are loaded. Smaller changes can fill several steps from each build. Write the combinations down before deciding whether a third full-size pair is necessary.
When combining types, check the manufacturer’s restrictions and follow any limitations on dropped work. Small change plates should not be expected to share the landing contact of the full-size discs. Confirm that the chosen combination is supported in the way you use it.
Buy additional 45s only when they solve a known loading gap
A second pair of 45s can be valuable if several workouts demand heavier pulls. It adds 90 lb to available loading and storage. If you are still choosing among lower working ranges, a lighter pair or several change plates can give you more progression options from the same footprint.
Estimate the new rack load and depth before buying. Two extra thick 45s can occupy a large section of a horizontal rack or make a peg protrude farther into the room. Store additions where you can move them directly to the bar. Their usefulness falls if the location makes every warm-up change cumbersome.
Check sleeve capacity at the planned future load. If the next pair can only fit with the collar partly off the sleeve, choose a thinner approved set or a different arrangement. Maintaining full and proper collar fit is part of planning the build.
Make plate storage work in the smallest practical footprint
The right rack depends on how the discs are removed. A tree fits several plates vertically and needs clearance beyond the peg ends. Horizontal storage holds plates upright in slots and needs room to lift them out. Both options work better when the most frequently used pairs are close to the bar.
Measure the usable peg and the space beyond it
Use the length available after any fixed stopper or other manufacturer limit. Add the thickness of the plates assigned to each peg. Include each plate in the order you expect to remove it, especially if one small change disc sits behind several heavy bumpers.
Three 45 lb Echo discs, for example, represent 7.20 in of plate thickness. Three Hi-Temp discs represent 11.25 in. A storage peg that fits the first stack may be too short for the second, even though all discs fit the same Olympic sleeve category. Check the tree’s rating per peg and for the complete assembly.
Allow room for the plate to come off completely. A shallow corner can look appropriate until the outer disc hits the wall on removal. Mark the full movement from the back of the plate to its position in your hands, and keep the path clear of doors and bench feet.
Use slots when individual access matters more than stacking depth
A horizontal plate rack can separate pairs into slots and let you reach one without unloading a stack. This is helpful when you often alternate 25s and 45s. Verify that each slot fits the actual profile of the disc, including thick rims and any taper near the center.
A narrow slot is useful only if you can grasp the plate and lift it out smoothly. Check the hand opening and depth of the structure. Also check whether the largest disc has to tilt against a shelf during retrieval. A larger opening can make the rack more practical even if fewer slots fit into the same area.
For a mixed collection, assign specific slots to the thickest plates and narrow ones to lighter discs where the rack allows it. Keeping labels visible can reduce setup time. Check how the rack should be loaded to remain stable as weights are removed.
Use low storage for a small inventory if the support is suitable
One or two pairs can sometimes be stored in approved low positions without dedicating another wall to a large rack. Use a stable arrangement that prevents the discs from rolling, tipping, or interfering with the walkway. Check the storage surface and floor for the full combined mass.
Avoid leaning unsecured plates against a wall or setting them upright where they can roll. A low supported rack is useful when it restrains round discs and gives your fingers space around the rim. A crowded arrangement can make an otherwise small inventory awkward to handle.
If you store plates flat where the equipment maker permits it, check whether you can lift the lower plate without moving several weight discs from above. A little separation can improve daily use more than compressing the setup into the smallest possible rectangle.
Plan for floor contact, impact, and equipment sharing
Small gyms often share space with office furniture, parked vehicles, or other people. Choose the landing area and the types of lifts it can accommodate before buying plates. The density of the stored weights and the way the bar lands are separate questions.
Keep the bar’s landing area clear
Use suitable flooring or a platform under the intended touchdown points, with room for a controlled return. Follow the barbell and plate instructions. Rubber bumpers change the surface that meets the floor, though the underlying structure still has to be appropriate for the loads and use.
If you train upstairs, above a neighbor, or on an uncertain surface, confirm that the intended placement and activity are suitable. A mat or bumper plate does not establish a floor’s structural capacity, and a quieter impact does not mean all vibration is eliminated.
Evaluate pads as a change to the lifting setup
Impact pads can be useful where the equipment and environment support them. They can also raise the point at which the plates land or start. Check whether the changed height suits your lifts and whether you still have enough room around the bar and pads during setup.
If your usual sessions use controlled set-downs, a compatible protective surface may be more practical than pads that permanently occupy the lane. Consider how often you would use the pads and where you would keep them between workouts.
Keep planned weights available for each implement
If you share plates between a barbell, a sled, and loadable handles, check where you need them at the same time. A narrow inventory saves space when you load one station at a time. Shared plates can interrupt circuits if each implement needs the same pair concurrently.
Group your workout around the implement where possible. Keep change plates accessible on an appropriate holder so you can make a small adjustment without taking a heavy stack apart. A well-planned inventory saves floor space and repeated handling.
Frequently asked questions
A compact gym is usually constrained by one measurement more than the others. Use the actual bar, plates, and room to apply these answers, especially when deciding whether a thicker disc or larger set will fit with a bench and storage already in place.
Are thin bumpers worth buying for a compact bar?
Yes when the sleeves are short enough that a thinner plate makes a meaningful difference. Calculate the actual stack and required collar engagement first. When one pair is all you use, the benefit may be more noticeable on a storage peg than on the bar.
Can I fit a bumper setup in a closet?
A closet can serve as storage if the floor and equipment support it and there is room to remove the discs. Measure the real opening, including door panels and trim. Use a suitable holder and reserve a clear loading area outside the closet.
Do I need all five pairs to start?
Buy the sizes that build your current program. A suitable full-size pair plus smaller weights can cover many controlled lifts. Add heavier full-size pairs when the planned progression calls for them or when you need matching landing discs for an approved use.
Can I use a shorter bar to save space?
Yes if its sleeves accept your plates and the bar works with any rack you use. Check the space between its inner collars, the usable sleeve length, and the bar’s rating. Total length alone cannot establish whether a compact bar suits your setup.
What if the storage rack fits and I cannot remove the plates easily?
Measure the retrieval path and change the orientation or location. Check enough room beyond each peg and above each slot to hold the disc securely. A shallower frame can still be hard to use if the needed clearance is against a wall.
Conclusion
Choose rubber bumper plates for small spaces by building your shortest useful inventory around the weights you already lift. Measure sleeves and collars, leave clearance at both ends of the bar, and plan how each pair comes off its rack. A few carefully selected full-size pairs and compatible change plates can cover a useful range without taking up an entire wall.
More from Amazon
Programs that pair well with the guide above. Offers and eligibility are set by Amazon and may change.
Free shipping on eligible items, Prime Video and more. Eligible new members can start with a free trial.
Start a Prime free trialA Prime membership for ages 18-24 with a trial period. Eligibility is set by Amazon.
See Prime for Young AdultsAudiobooks and podcasts to listen to on the go. Eligible new members can start with a free trial.
Try Audible freeAd-free music streaming. Eligible new subscribers can start with a free trial.
Try Music Unlimited freeAs an Amazon Associate we earn from qualifying purchases.









Write Your Review
No reviews yet. Be the first to share your experience!