
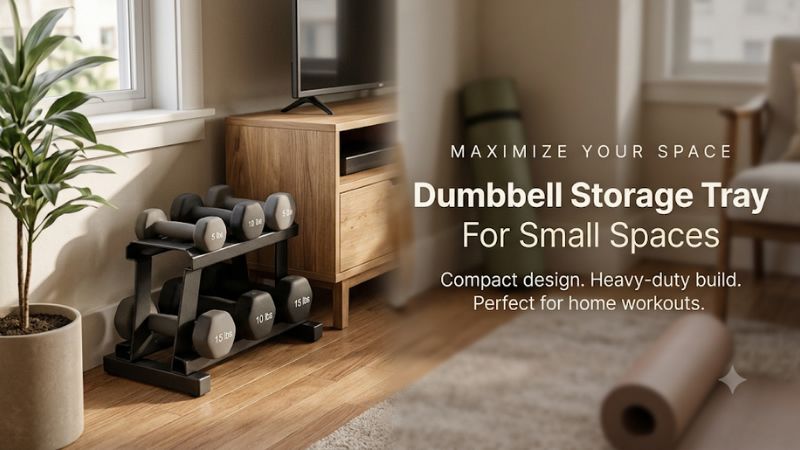
A dumbbell storage tray for small spaces works when its loaded width and pickup path fit your room. Measure the feet, the heads that extend beyond the tray, and the room your hands need at each pickup. A low base can fit under a shelf and still require extra space for lifting, selector access, or docking.
Measure storage, pickup, and adjustment separately
The smallest useful setup is the one you can leave ready and reach without clearing the room. Measure where the tray sits, where the dumbbells move when lifted, and where you stand to use the controls. Assess both sides of the pair, since the wall can restrict one position more than the other.
| Area | What to measure | What it tells you |
|---|---|---|
| Storage | Outside dimensions of both trays, stand feet, and fully loaded heads | Whether the setup fits in its permanent position |
| Pickup | Clear room above and in front of each dumbbell | Whether you can lift directly from the tray |
| Adjustment | Access to dials, pins, switches, or cradle controls | Whether you can change weights while the station stays in place |
| Return | Travel path from your workout area back to both trays | Whether the last set can be finished without stepping around obstructions |
| Room reset | Door swing, drawers, bench movement, and traffic | Whether the setup still works when the room returns to ordinary use |
Use the loaded footprint instead of the headline tray size
Measure the largest dimension the whole assembly occupies at rest. A floor cradle can protrude beyond the dumbbell, or a loaded head can sit wider than the feet below. On an elevated stand, compare both the footprint at floor level and the outline around the trays and fully loaded pair.
The REP QuickDraw cradle illustrates the calculation. REP lists each cradle at 20.6 × 8.45 in. Place two in parallel with their long sides adjacent and the combined rectangle is 20.6 × 16.9 in before adding any gap. Place them end to end and the rectangle becomes 41.2 × 8.45 in before the gap. The same pair can suit either a deep corner or a shallow wall.
Both calculations describe the footprint only. The final placement also needs hand clearance, room to operate the controls, and any separation specified by the manufacturer. Add those dimensions after choosing an orientation. A 42 in clear wall may fit two trays end to end and still leave too little room at the outside control.
Measure upward clearance from the loaded dumbbell
The empty tray height tells you how much room the base uses. It does not describe the space needed to lift the handle free. Check clearance from the highest solid part of the loaded dumbbell to the underside of a shelf, the bed frame, or any obstruction above the station.
An adjustable holder may leave unselected plates in the base. The handle and selected plates need room to come out squarely. A shelf that allows just enough room to slide the dumbbell and base into place can block a normal vertical pickup. You might need to bring out the complete setup to use it, which changes the practicality of the location.
For fixed dumbbells on a low tray, consider where your hand enters and how high the dumbbell must rise to clear the lip. Test the removal motion while another weight occupies the adjacent position. A lower lip may be easier to clear, provided that it supports the intended dumbbell shape and retention requirements.
Check whether both controls face usable space
A dial at the end of the dumbbell needs enough room for your hand to turn it. A side pin needs a clear removal path. If the original orientation puts a control against a wall, test another approved orientation or move the station farther forward. Keep the support level and usable on both sides.
A two-dumbbell arrangement can conceal the inner control. When trays are packed tightly, the second dumbbell may block the path for the pin, or your fingers may not fit between the two shapes. Check the actual mechanism with both weights at rest in the readiness position.
Where an adjustable unit requires the dumbbell to remain seated during a change, leave the original cradle in its normal working location. Sliding the whole unit every time a knob needs to turn creates extra handling and can disturb the setup. Change the layout before forcing a compromised adjustment path.
Choose the type of tray your dumbbells need
The appropriate tray depends on how the dumbbell rests and whether the support participates in weight selection. For fixed dumbbells, fit around the heads and access to the grip matter. For adjustable dumbbells, preserve the maker’s positioning requirements and evaluate any stand as part of the full assembly.
Use a fixed-weight tray to define a low parking spot
If you own one or two fixed pairs, a purpose-built tray with approved support can create a consistent place to return them. Choose a size that fits both heads comfortably and leaves room for your fingers. For round heads, use a design with suitable retention rather than relying on a low lip alone.
Compare the heaviest object you plan to place on the tray. Two 25 lb dumbbells total 50 lb. If the tray or supporting platform has a published capacity, check how it applies to the whole surface and to each contact point. Light utility trays may be sold for shoes or damp items and give no guidance on supporting dense weights.
One tray can be more convenient than two separate positions when the pair always moves in and out together. Two approved resting positions can fit narrow gaps along a wall and give each grip more room. Keep the arrangement away from traffic and the route you use to leave the room.
Keep factory docking trays with selector dumbbells
A factory cradle can position plates and support the weight-selection sequence. Keep that assembly together according to the manual. The narrowest practical footprint may be the original tray placed directly on a suitable firm, level surface. A bigger stand becomes useful if its height or placement solves a concrete problem.
For an AD80 example, one 19.31 × 7.77 in cradle occupies roughly 150 sq in before working clearance. Two placed side by side across their narrow sides occupy roughly 19.31 × 15.54 in before gaps. A stand must support and position both cradles together with the fully loaded dumbbells.
Check total mass too. Snode lists 15.3 lb per AD80 cradle. Two 80 lb dumbbells and their two cradles contribute 190.6 lb before any stand. That matters for a small room where you may be tempted to place them on a general-purpose shelf. Verify the stand and supporting surface independently.
Use a tray-top stand when it fixes the pickup height
An elevated stand can help when the floor position is hard to reach or returning the dumbbells to their cradles requires an awkward bend. Verify model support, footprint, and the available pickup area. A smaller advertised base can still extend into a walkway once the trays and dumbbells are on top.
For example, the PowerBlock Small Compact Stand measures 16 × 14 × 25 in unfolded for specified compatible models. It is a complete elevated platform for that intended application. It holds up to 50 lb per dumbbell under PowerBlock’s stated limits. Check exact model fit as well as weight.
If your existing adjustment tray bolts to a stand, check the real mounting pattern and hardware. A surface that is just large enough for the tray may leave little room to grasp the dumbbell or return it squarely. A matched stand can simplify alignment when the maker documents how the cradle fastens to it.
Use a rack-mounted tray when the frame is already in the room
A tray that bolts into an existing, compatible rack can avoid adding another set of legs. That makes it worthwhile if you already have an appropriate bay. Check where the tray and heads project into the exercise opening and how the shelf affects benches, cables, attachments, and barbell loading.
Measure from the correct upright faces and use the installation diagram. A listing with a nominal 41 or 43 in width describes a particular system. The hardware and mounting span still need to match. A frame with similarly sized tubing can use a different hole pattern, hole spacing, or orientation.
Place the tray where it has a clear pickup height. An additional row can be compact and useful at an accessible level. A row mounted under another attachment may force you to bring the dumbbell out at an angle or lift through the space another movement uses. Verify the assembly in the normal workout configuration.
Plan around the room you actually have
A narrow wall, an alcove, and a shared living space make different demands on storage. Decide whether the dumbbells stay in one working position all week or need to be packed away after use. Check who uses the room and what has to move during their ordinary activities.
Set up along a shallow wall if you can reach the ends
Placing separate cradles end to end can reduce how far they project into the room. This approach works well if the wall is long enough and each outside control remains accessible. Leave a gap where the inner controls or plate guides need it, and check whether the bench blocks one of the positions.
Place the wider end near the open approach. Avoid running the trays so close to the wall that you must stand sideways with a heavy pair in hand. Tape the outside dimensions, place a box where each loaded dumbbell will sit, and rehearse the motion safely.
Compare the end-to-end layout with parallel trays before committing. One arrangement may have a smaller depth and a longer pickup path. The other may group the pair conveniently near the bench at the cost of several inches of depth.
Use a low alcove only when the dumbbells can come straight out
A low shelf or the bottom of a closet can work for fixed dumbbells when you have a suitable surface and unobstructed access. The rack or tray needs enough loading clearance at the opening. A space that is wider inside than at its doorway can make the bulkier weights difficult to bring out.
For selector dumbbells, decide whether this space is for parking or for adjustment. A base under a low shelf may need to slide into the open before you can lift the selected handle vertically. If it is too awkward to move the full system every time, place the working station elsewhere.
Check doors in their open and closed positions. A bifold door can eat into the usable width. Sliding panels expose only part of a closet at any time. Leave a stable place to rest the weights where neither the door track nor the frame blocks your hands.
Keep the workout lane open in a shared room
Choose a permanent station outside the room’s main walking route. Move smaller training items, such as a mat or bench, when resetting the room if doing so makes access easier. A fitted tray does little good if it is constantly moved with the equipment loaded.
Mark the pickup and return area next to the station. A large bench can make this space temporarily smaller. Place it in both flat and incline positions to see whether the end of the bench, its wheels, or its back support interferes with either tray.
Use secure storage appropriate to the household if children or pets can access the equipment. Position loose weights and trays away from play routes. Follow the manufacturer’s guidance on loading, assembly, moving, and any restraint requirements.
Use a practical fit test before ordering
Confirm the exact configuration before ordering a tray for a narrow location. The most useful test recreates the outline and pickup path with objects you can move easily. It should also account for the weight stored there and what needs to happen when the equipment is returned after use.
Make a floor outline and a full-height outline
Use tape to represent the stand or cradle base and cardboard or boxes to show the loaded heights and head projections. For two trays, include their separation. Rehearse reaching both grips and clearing any ledge. The exercise lane is what remains after the storage and retrieval areas are marked.
A floor outline alone can miss the top shelf, wall-mounted equipment, or moving handles of another machine. Include cabinet doors and adjustable bench positions. Move the outline before spending money if one of those obstacles overlaps the intended weight path.
Check every surface independently of tray size
Use the fully loaded arrangement to assess suitability. A rigid rack frame is only as appropriate as its installation, feet, and supporting surface. A thin mat may protect a suitable finish from direct contact but provides no basis for assuming the underlying floor can support a concentrated load.
Follow the maker’s loading and surface instructions. If a heavy setup will be kept on a raised platform, lightweight furniture, or a floor whose capacity is uncertain, confirm suitability before loading it. Keep the support level and the pads or feet within a stable surface.
Compare the time required to reset the setup
Consider how many times a workout takes you back to the tray. If you use three adjustable settings in one session, easy access to the selectors can be worth some additional floor space. If you store one fixed pair for occasional work, a lower tray in a suitable spot can be more useful than a permanent elevated stand.
A setup in storage can look compact and take several steps to prepare. Count the lifting and repositioning between storage and workout time. A slightly larger fixed location can be the better space choice when it keeps the walking area clear throughout the session.
Frequently asked questions
Fit comes down to how the full assembly behaves in the room. These questions address common space trade-offs and the measurements most likely to be missed. Apply the answers to the exact weights and hardware you plan to store.
Can I store adjustable dumbbells under a bed?
Only use a position that fits the equipment and allows safe retrieval. If the bed blocks upward withdrawal from the cradle, plan a supported working station elsewhere. Check the fully loaded weight before deciding how to move the pair from storage to that station.
Are two separate trays better for narrow rooms?
Two individual trays can be arranged end to end or side by side if the design allows. This can fit a shallow wall more easily than one rigid platform. The right orientation also has to leave the selectors, handles, and docking path accessible.
Should I place a tray on a carpet?
Use a firm, level surface suitable for the tray and equipment. Soft or deep carpet can allow a loaded base or stand to tilt. Follow the manufacturer’s surface guidance and check all contact points before storing the full load.
How much clearance do I need above an adjustable cradle?
Use the actual lift-off path of your model. The handle and selected plates need to clear the plates and guides that remain in the base. Allow enough overhead and forward room to perform the movement squarely without touching a shelf.
What if I only have one fixed pair?
If a purpose-built tray fits the pair and solves a floor-contact or organization problem, it can be a simple solution. A suitable, clear floor location may also serve. Compare the tray’s support and retention with the size and shape of the weights before buying.
Conclusion
Choose a dumbbell storage tray for small spaces by measuring the loaded setup and rehearsing the pickup, adjustment, and return paths. Use original cradles for selector dumbbells, a compatible elevated stand when height matters, or a supported low tray for a few fixed weights. A layout works when you can reach both dumbbells without shifting the station or blocking a route through the room.
More from Amazon
Programs that pair well with the guide above. Offers and eligibility are set by Amazon and may change.
Free shipping on eligible items, Prime Video and more. Eligible new members can start with a free trial.
Start a Prime free trialA Prime membership for ages 18-24 with a trial period. Eligibility is set by Amazon.
See Prime for Young AdultsAudiobooks and podcasts to listen to on the go. Eligible new members can start with a free trial.
Try Audible freeAd-free music streaming. Eligible new subscribers can start with a free trial.
Try Music Unlimited freeAs an Amazon Associate we earn from qualifying purchases.









Write Your Review
No reviews yet. Be the first to share your experience!