
This vertical dumbbell stand buying guide starts with your dumbbells. List every pair, add the entire load, and check clear handle length and head spacing against the rack. Once the cradles fit, verify the loaded footprint and where you will stand to lift the heaviest pair from its assigned position.
Build a rack specification from your collection
The first specification comes from the weights you own. Record each dumbbell, the number of pairs, and any single weights you intend to store. Identify the shortest handle, widest heads, and heaviest piece. Together they set the rack’s requirements for count, geometry, and load.
| What to measure | What to record | Why it matters |
|---|---|---|
| Inventory | Number of pairs and individual weights | Establishes position count and total stored load |
| Heaviest dumbbell | Labeled load and intended cradle | Checks individual and position-specific limits |
| Clear handle length | Gap between the heads at the intended contact point | Shows whether the dumbbell seats correctly and leaves grip access |
| Head size and shape | Width, depth, and any rounded or tapered surfaces | Helps predict contact with the cradle and neighboring pairs |
| Placement | Loaded dimensions and real pickup path | Determines whether the rack fits your working area |
| Planned growth | Specific next pair and its combined weight | Shows when an additional position or stronger rack is needed |
Calculate storage load from individual dumbbells
Add both dumbbells from every pair. A 10 lb pair weighs 20 lb in storage. A 5–25 lb sequence in 5 lb steps is 2 × (5 + 10 + 15 + 20 + 25), or 150 lb. One 15 lb single added to the same inventory brings it to 165 lb and uses one more position.
Do the same for the newest pair you expect to buy. Adding two 30 lb dumbbells to a 150 lb collection gives 210 lb. If you own a 200 lb stand, that addition exceeds its total even if an open position appears available. Count and capacity are two independent checks.
Add the rack’s own weight when evaluating the loaded placement. A rack’s total dumbbell rating describes what the rack can hold under the manufacturer’s conditions. The combined load on the supporting surface also includes the weight of the steel, feet, and any approved accessories stored on it.
Check the limits on one cradle and on the entire rack
Some makers publish both total weight and a per-dumbbell limit. Titan’s five-pair rack is an example, with 50 lb per cradle and a 500 lb total rating. One 55 lb dumbbell exceeds the individual limit even on an otherwise empty stand, while ten compatible 45 lb dumbbells total 450 lb.
If the manufacturer designates particular weights for particular positions, follow that layout. A lighter top pair and a heavier bottom pair often make physical sense on an A-frame, but use the rack’s own directions. The maker may specify where the geometry and stability are designed to accommodate the largest weights.
If the product names a supported set without giving every limit separately, compare your inventory with that set. A rack described for a particular 5–50 lb hex run has a documented use case. Verify any different arrangement that has an unusual number of heavy pairs, another shape, or loading concentrated on one side.
Separate a “five-pair” claim from the stated weight range
A five-tier A-frame often has one position on each side per tier. Count actual supports in the manual or product diagram. A “five-tier” retail headline might also describe shelves rather than ten individual cradles. A buyer with ten single weights needs ten usable positions, with access at each position.
The maximum listed dumbbell weight cannot tell you how many high-weight specimens the stand accepts. For example, a 200 lb rack that lists some 35 lb dumbbells could not support five 35 lb pairs at once, since that would weigh 350 lb. Each dumbbell’s fit, each assigned spot, and the overall limit still apply.
Write down the inventory in the order you expect to load it. This makes it easy to identify whether your assumption depends on putting a larger pair in a spot meant for smaller heads or using one side more heavily than the other.
Match the cradle to the dumbbell’s actual geometry
Most vertical racks use shaped supports rather than full shelves. The support can contact the handle or a region near the head, depending on the design. A secure connection depends on width, depth, and clearances around adjacent weights, especially when mixing brands or finishes.
Measure the clear usable handle length
Measure between the inner faces of the heads across the portion of the handle the rack will support. If the handle flares or is contoured, note the shape at the point where it would contact the cradle. A listed grip diameter gives less information than clear length and the amount of room on either side of the support.
A rack specification such as a 4.25 in resting width can guide the comparison, as on Titan’s five-pair model. Determine what the manufacturer measures with that term before treating it as a guaranteed minimum handle length. Compare the actual diagrams or ask the maker about your exact dumbbell.
Leave room for your hand as well as for the frame. A dumbbell might settle into the cradle when placed carefully with both hands, while offering inadequate grip clearance on a normal pickup. Test whether you can reach the handle directly with the other pairs in their usual positions.
Check the head shape and the spacing between tiers
Rubber hex, bare cast hex, round urethane, and short neoprene dumbbells do not all share the same shape. An opening that retains a narrow handle can still crowd a large head. A round dumbbell requires the designated support geometry to keep it in place.
Measure the head from its widest point and note whether it projects beyond the grip as you seat it. Compare that to the next tier above, below, and on the opposing face where relevant. Two weights that fit separately can touch when both are stored. This is a common reason a mixed collection needs more room than a matched series.
Check flat versus rounded contact too. An A-frame advertised for hex dumbbells has a defined intended use. A round dumbbell may require a molded saddle or another rack designed for that shape. The fact that a round head can be placed on a support temporarily does not establish compatibility.
Check removable pads and how they affect fit
Rubber or plastic cradle liners can protect contact surfaces and reduce direct metal-on-metal noise during controlled placement. They also take up space. A handle that almost fits a bare opening may bind once the correct liner is installed. Use the rack’s specified parts and verify the actual assembled dimensions.
Inspect whether a liner is properly clipped or attached before loading. If it shifts or is damaged, follow manufacturer guidance. A pad that moves can reduce effective clearance and change the way the dumbbell rests. Request the correct replacement instead of guessing how much material to add or remove.
Compare the depth of the supports as well. A narrow hook can accommodate a short handle yet leave less tolerance for the shape of the heads. A full map of where the weight seats is more useful than the word “padded” in the listing.
Choose the frame style and access direction
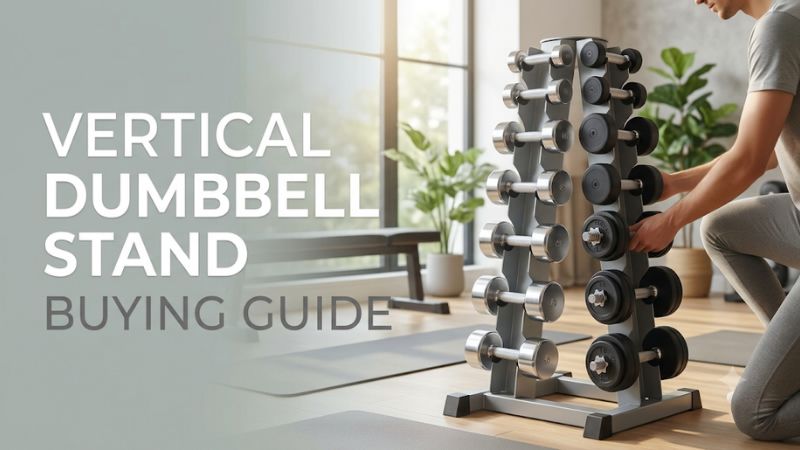
Once your dumbbells fit the supports, think about how you want to reach them. An A-frame puts the pairs in a staggered arrangement. A tower can keep the storage envelope narrow. A multi-sided rack may make efficient use of open space if you can use all faces.
Choose an A-frame for a short conventional run
A compact A-frame often fits four or five pairs and staggers the supports to give users space around the grips. It works well if the weights match the intended geometry and all frequently used pairs can be picked up without leaning around the stand or reaching into a tight corner.
Check whether the lower feet flare into the approach path and where the largest heads sit. Well-labeled pair slots can help a household keep weights matched. If you move between pairs often, place the rack where both sides or both columns are reachable without stepping around the bench.
Count expansion carefully. Going from a four-pair to a five-pair model can be worthwhile if the fifth load is already planned. A small A-frame can also be an efficient permanent solution when you have only a short, well-defined range.
Choose a tower when wall or floor width is the constraint
A tower can support several pairs in a narrow column. If you select a taller model, check overall height plus the space to lift from the upper slots. Identify the bottom pair’s pickup position and whether a fixed obstruction will force you to turn your hand while handling it.
Check the manufacturer’s loading and placement instructions particularly closely on a tall frame. A narrow profile concentrates storage in one location and makes the condition of the floor and base contact important. Confirm capacity for the entire loaded setup and verify that all feet contact the support surface.
Some towers are designed for a specific family of dumbbells. Compare the brand and exact series with your weights. A narrower stand for the correct model may be more useful than a generic taller rack with uncertain geometry.
Choose multi-sided storage only if the room can use it
A 2- or 3-sided stand can store a larger inventory in a concentrated area. Check how many faces really need approach clearance. A tower in the corner of a room may fit the frame footprint but leave one side blocked, reducing the number of usable positions.
Use the actual layout rather than a catalog photo. Draw each plane you need to approach and mark where you will stand to remove the lowest or heaviest pair. A floor plan can reveal a route that crosses the bench or leads through a doorway. A different position may work without changing rack style.
If you want the rack close to a wall, confirm that the loaded heads clear it and that any required installation conditions are met. A front-access shelf can be a better choice when the room has more wall length than open clearance around a tower.
Verify the purchase, setup, and long-term use
The final phase starts with the exact model, variant, and assembly instructions. Make sure the price is for the rack you intend to use and confirm how it will be delivered. After assembly, check the unloaded base and verify fit at the intended positions before storing the full collection.
Check the exact assembled dimensions before ordering
Use the technical drawing or manual if possible. Retail pages can show packaging dimensions, measurements for another configuration, or inconsistent figures on the same page. Ask for the dimensions of the assembled base and the distance between cradle positions if the available room is tight.
Check the model suffix. A revised version can have different feet or support spacing even if the product title looks similar. Compare the documents associated with the selected version rather than assuming an older product sheet applies.
Use your tape measurements to verify the shopping decision. If you cannot get clear dimensions for a tight installation, treat fit as unconfirmed. Consider the retailer’s return terms and verify any assumptions with the seller before ordering.
Assemble and load according to the instructions
Place the rack on a suitable, level surface. Follow the tightening sequence and ensure liners and feet are fitted correctly. Check that every foot meets the floor. If the rack rocks or leans, resolve the issue before putting weights on it. Use the product’s instructions for installing any restraint or other required part.
Start checking fit with manageable weights. Confirm that they seat fully, remain supported when placed down under control, and can be lifted clear without catching. When you move to heavier weights, use the assigned positions and keep the stand within all stated limits.
Do not move a loaded rack unless the manufacturer approves that use. Inspect the rack periodically for loose hardware, bent supports, missing pads, or damaged joints. Keep the floor and the area around its feet clear so the rack does not become difficult to approach.
Set a sensible limit for future purchases
After you assign the current pairs, calculate how much permitted capacity remains. Then check the unused spaces and identify what sizes they can hold. A rack may have 50 lb of nominal capacity remaining and no usable extra positions. It may also have free positions while the total limit is already close.
If you plan to add a new size, measure the incoming dumbbell’s grip and heads before ordering. Confirm whether it changes the loaded footprint or your ability to use another slot. Update the load tally and move weights only within the maker’s storage instructions.
Frequently asked questions
The last buying questions usually concern weights that look close enough to fit, or racks whose capacity and positions are described in different ways. Treat unclear fit as a detail to settle before paying for and assembling the rack.
Can I mix dumbbell brands on a vertical rack?
Yes when each dumbbell’s geometry and weight are supported, all neighboring positions remain clear, and the total stays within the rating. First check the shortest handle and largest heads. If the rack is intended for a named dumbbell family, ask the maker before mixing in another design.
Can a 500 lb stand hold a full 5–50 lb set?
A complete 5–50 lb set in 5 lb increments totals 550 lb across ten pairs. That exceeds a 500 lb total rating. A stand also needs at least ten compatible pair positions. A spec of “up to 50 lb per dumbbell” does not establish support for the entire run.
What if I have both hex and round dumbbells?
Select a rack with documented support for both, or choose compatible storage separately for each shape. A horizontal shelf with approved retention may accommodate a more varied inventory. Check the rack maker’s guidance for round weights rather than judging from a photo of the cradle.
Does a wider base guarantee stability?
Base dimensions are one part of stability. Assembly, load distribution, floor condition, and placement also matter. A rack with poorly seated weights or uneven support needs its setup corrected irrespective of the width of the feet.
Should I buy a rack with some room left over?
If a specific new pair is likely, verify that it has an approved position and that the full inventory stays below the applicable limits. If you have no plans to expand, a smaller stand that fits all current pairs can save space and money.
Conclusion
Choose a vertical dumbbell stand by adding the complete stored weight and matching every dumbbell to a compatible position. Measure the clear grip, head shape, and pickup space before comparing frames. When the rack fits your heaviest pair, remaining inventory, and daily access path, it has the specifications that matter for your home gym.
More from Amazon
Programs that pair well with the guide above. Offers and eligibility are set by Amazon and may change.
Free shipping on eligible items, Prime Video and more. Eligible new members can start with a free trial.
Start a Prime free trialA Prime membership for ages 18-24 with a trial period. Eligibility is set by Amazon.
See Prime for Young AdultsAudiobooks and podcasts to listen to on the go. Eligible new members can start with a free trial.
Try Audible freeAd-free music streaming. Eligible new subscribers can start with a free trial.
Try Music Unlimited freeAs an Amazon Associate we earn from qualifying purchases.









Write Your Review
No reviews yet. Be the first to share your experience!