
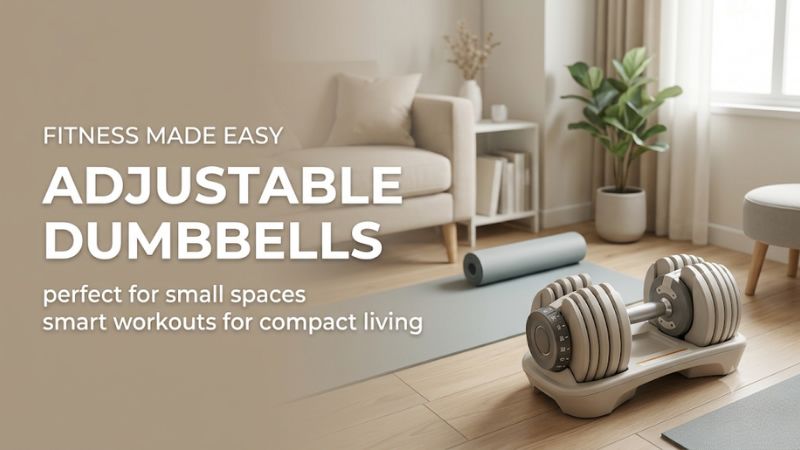
The right adjustable dumbbells for small spaces fit where you store them, where you change weights, and where you lift. Measure those three areas before comparing sets. A compact pair on paper can still block a closet door, crowd a floor press, or need a tray you can barely reach under a low shelf.
Start with the storage, adjustment, and lifting areas
A pair can fit inside a closet and still be awkward to adjust there. It can also fit nicely under a bench while leaving too little floor space for you to stand, lift it, and put it back. Check all three areas while the room is arranged the way it will be on a normal workout day.
| Area to measure | What to include | Useful check |
|---|---|---|
| Storage | Both loaded dumbbells, both trays, any stand, and space for a door or drawer | Can you open the storage area without moving either loaded dumbbell? |
| Adjustment | Access to selectors, room for both hands, overhead clearance, and a stable surface | Can you select a new weight and return both dumbbells squarely? |
| Lifting | Your body, bench, arm path, dumbbell length, and the path back to storage | Can you complete your widest movement and set the pair down without stepping around furniture? |
Measure the full footprint of both trays
Published dimensions may describe a single dumbbell, a cradle, a complete pair, or shipping packaging. Find the figures for the parts that sit on your floor. If a listing gives only the dumbbell dimensions, look up the tray dimensions or ask the seller. At tight tolerances, a few inches can change the layout.
For example, REP lists a single QuickDraw cradle at 20.6 × 8.45 in. Two cradles placed parallel with their long edges facing one another would occupy a bare rectangle of roughly 20.6 × 16.9 in before adding any gap. Put those same cradles end to end and the bare layout is roughly 41.2 × 8.45 in. The first fits some deep corners. The second can work along a shallow wall if you have enough usable length.
This is a measurement example, rather than a universal spacing recommendation. Add room for your hands, access to the adjustment controls, and any practical separation specified by the manufacturer. If a closet has a 22 in clear interior depth, the 20.6 in cradle may fit front-to-back. The usable arrangement still depends on what happens when you open the door and reach for the far dumbbell.
Measure the doorway and the space above the setup
An alcove can be wider inside than it is at the entrance. Baseboards take away usable space at floor level, and sliding closet doors expose only part of an opening. Measure between the obstructions that the equipment will actually pass through, then confirm that you can still grip both ends comfortably.
Vertical clearance matters even under an open shelf. The selected dumbbell needs to rise far enough to clear unselected plates. You need additional room to hold it level while moving it away. A product labeled 8 in high will rarely be practical directly under a shelf with only 9 in of open height if you expect to lift and re-dock the dumbbell there.
Decide early whether the closet is a permanent adjustment station or just storage. If the tray needs to come out before every workout, count that as setup work. If the tray holds a heavy pair and unselected plates, it can also create a repeated lifting task that a product’s headline dimensions never capture.
Mark the lifting area with your widest and longest exercises
Use painter’s tape to mark the proposed tray rectangle. Then walk through a floor press, bent-over row, reverse lunge, and overhead press with empty hands or unloaded practice objects. Include the space you’ll need to pick up and return the dumbbells. Try both sides for single-arm work.
For a floor press, allow room to get into position and lower both weights under control. For lateral raises, check walls and furniture along the full arm path. For a split squat, account for your rear foot and the extra width of dumbbells hanging outside the thighs. If you use a bench, measure from the bench in the position you train in, including any extra length or rear clearance when inclined.
Overhead work has its own geometry. Stand where you expect to press and account for your reach plus whichever part of the dumbbell extends above the grip. Ceiling fans, exposed pipes, pendant lamps, and sloped ceilings can limit the exercise even when the rest of the room is open.
Choose a design that works in your room
The best mechanism for a tight room is the one you can reach and operate where it sits. Compare what happens when the equipment is fully stored, when most of the plates remain in a cradle, and when each dumbbell is fully loaded. All three arrangements matter in everyday use.
Understand when a compact selector block fits
A selector block can package several settings in a short rectangle. PowerBlock lists the Sport 24 at 10 × 5.5 × 5.5 in per dumbbell. Two side by side occupy a bare 10 × 11 in rectangle before space for hands, the selector, or a stand. Its ceiling is 24 lb per hand, so the dimensions make sense only if that load covers your plan.
A recessed grip can reduce the overall profile but surrounds your hand with rails. If you use thick gloves or prefer a large wrist angle in curls, inspect those openings closely. To use a selector beside a wall, turn the blocks so the accessible side faces you. Leave enough room to operate the pin without shifting a loaded block to reach it.
A larger expandable block can also work in a small room. Verify the dimensions of the final stage you expect to own. An extra few inches of length may be harmless on an open stand and incompatible with a narrow shelf or the space between a bed and wall.
Plan around the cradle on a twist-handle or dial design
Twist-handle models make it easy to change resistance without laying out individual plates. That convenience depends on a reachable cradle. Plan for the tray itself, the clearance needed to seat the dumbbell, and a level place where unselected plates can remain while you train.
Some designs physically shorten at lighter settings. Core Home Fitness lists its 5–50 lb dumbbell at 9.3 in long at the starting weight and 14.5 in at the maximum, excluding the cradle. A shorter light assembly can make curls and raises easier to fit around furniture. The tray still occupies its full footprint, so deduct that area when calculating your usable floor space.
With an end dial, check where the dial faces. A design can fit neatly against a wall while giving you awkward access to one end. Start with your preferred stance and hand position, then rotate the trays if needed. Position both so that you can see the setting and seat the selected weight without leaning across the other loaded dumbbell.
Give loose plates a proper place with manual systems
Manual spin-lock and locking-screw designs let you store handles and loose plates separately. That can suit a closet with several small, suitably rated shelves or a corner with room for a low plate holder. Their footprint depends on how you organize the whole inventory, including collars and plates left off the handles.
Create one stable place for loading and unloading. Keep collars together and arrange matched plate sizes where you can reach them. The floor can work for a light kit, but recurring floor-level changes may get cumbersome with a heavier set. If you use shelving, compare its rating and support with the weight of the loaded equipment and placement of the plates.
Do a simple inventory when the set is configured at its lightest weight. This is when most plates need separate storage. Plan where they go before choosing a manual set based on the fact that the handles alone fit under the bed.
Match the layout to your room and training routine
Small-space setups work best when storage and exercise placement fit daily life. A permanent corner can support a heavier system. A shared living room rewards quick setup and a clear reset afterward. The best arrangement also depends on which loads you use and whether a bench is part of your routine.
Use a storage position and a workout position in a shared room
In a living room, choose an area where the pair can be used without moving furniture every day. A bench, if you use one, can come into the open area only during the session. Keep the weight station near enough that you can return the loaded dumbbells without crossing a walking route or stepping over the bench.
Account for the total mass before planning to move the setup. Two 50 lb dumbbells already total 100 lb before trays or a stand. A small visible footprint can hide a heavy system. For frequent room resets, it can be easier to keep the base in a permanent position and move a mat or bench as needed.
If someone else uses the room, test the layout with that in mind. Drawers need to open, housemates need a path through the room, and the heaviest equipment should have a predictable location outside normal foot traffic. A pair near the wall is useful only when you can still work the selectors and load the dumbbells easily.
Set up floor work away from furniture edges
A bedroom may have just enough space for a mat, a small pair, and a narrow route to the door. Put the trays where you can reach them before getting down to the floor. Run through how you’ll get into a floor press and where you’ll place the dumbbells at the end of the set.
If a nightstand or bed edge is at shoulder height when you’re on the floor, include it in your clearance check. You need room to end the set with control, especially when the weights are wider or longer at the setting you use for presses. A wide enough area at standing height can be too narrow for your arms near the floor.
Under-bed storage works best when the equipment can come out in manageable pieces and sit in a stable position during use. Check the clearance along the whole path, including support legs under the frame. Free space visible at the edge of the bed may disappear deeper inside.
Use shallow storage only if the approach stays open
A narrow wall can fit two trays end to end while leaving a much smaller depth than a side-by-side layout. This is useful in a tight den or dedicated nook. The practical test is whether you can approach either tray directly, lift its dumbbell vertically, and return it without turning sideways around furniture.
Allow space for your stance in front of the station. Your feet and torso occupy part of the apparent walkway when you bend to select a weight. A layout that fits on a floor plan can still feel tight if the wall behind you or a desk at your side limits how you pick up the dumbbells.
If floor-level handling is difficult, a purpose-built stand can improve access. Measure the feet as well as the top. A stand may widen at the base, and the top height can place the selector too close to a low shelf. Use a stand whose ratings and compatibility cover both fully loaded dumbbells, cradles, and any expansion hardware.
Protect flooring and keep weight changes predictable
Floor protection, noise, and handling all begin with stable support. Use your fully loaded storage weight for planning even when a typical workout uses only half the plates. Verify that the floor surface, mat, or stand keeps both trays level when you lift or return each dumbbell.
Account for concentrated weight and surface stability
A loaded pair transfers its weight through relatively small points at the feet of the cradles or stand. Use a firm surface compatible with the equipment, taking floor finish and mat suitability into account. Deep carpet or soft foam can let a tray tilt or press into the surface during docking.
A suitable mat can protect surfaces from ordinary contact and reduce some equipment noise. Controlled set-downs still do most of the work. Moving loose plates quietly, placing both trays on a firm level surface, and choosing a storage spot away from a frequently used doorway can improve the setup before you spend on a thick mat.
Follow your equipment maker’s placement instructions. For an unusually heavy setup, uncertain shelving, or an older structure with unknown conditions, check building or property guidance before concentrating heavy equipment in a small area. Published dumbbell dimensions cannot establish how a particular floor or shelf will behave.
Check each adjustment before leaving the station
Seat the dumbbell as directed by the manufacturer. Move the selector fully to an indicated position or secure both collars according to the manual. Verify the setting on each handle. Lift smoothly enough to see whether the correct plates have released from the tray or are properly captured.
If anything binds or shifts, return the weight to the supported position and recheck the assembly. The space should allow you to stop and set it down immediately. That is a useful reason to keep the docking area clear during the entire workout, even if you only change the load at the beginning.
Fit the capacity to the room you can use
Begin with your heaviest regular movement and ask how you will safely start and finish it inside the space. A buyer who needs 60 lb per hand primarily for rows may be able to train comfortably with a sturdy dedicated station. A buyer using 15–25 lb weights several times a week can benefit more from easy access, low minimum weight, and smaller steps.
Estimate future capacity using the exercises you expect to keep. If you already train heavy lower-body movements elsewhere, your apartment set may only need to cover accessories and moderate presses. That can open up smaller and easier-to-store options. If the pair is your main source of resistance, evaluate both current loads and the realistic expansion footprint.
Frequently asked questions
Use these answers to resolve common layout decisions before buying. Pay attention to whether your proposed storage setup serves only as a parking spot or also functions as the place where you lift, adjust, and return the dumbbells throughout a session.
Can adjustable dumbbells be stored vertically?
Use vertical storage only when the manufacturer approves it for that exact system and the stand supports the equipment as designed. Many cradle-based sets are meant to sit flat. The trays hold unselected plates in alignment and help the locking mechanism operate safely.
Can I use a folding bench in a small dumbbell setup?
Yes, if its full working position fits your taped exercise area and you can get on and off it without stepping over weights. Check ratings and stability in the configurations you will use. Measure the folded size separately, including any feet or wheels that protrude during storage.
What if my selector tray is hard to reach on the floor?
A compatible stand can bring it to a more reachable height. Check that you can still lift the dumbbell vertically out of the tray and put it back without twisting. Low furniture that happens to fit the trays should be checked for stability, support, and capacity before use.
How do I keep a small home gym quiet?
Use controlled set-downs, keep loose plates organized, and put the trays on a firm compatible surface. If a selector is suddenly noisier or a loaded handle feels loose, stop using it until you can identify whether the plates and selector are seated correctly.
Is one dumbbell enough if space is extremely limited?
One works for many unilateral exercises, including rows and some presses or carries. A pair is more direct for coordinated two-handed exercises and can shorten sessions that would otherwise require individual sets for each side. If one dumbbell is all you can fit comfortably, buy for exercises that work naturally with it.
Conclusion
Choose adjustable dumbbells for small spaces by measuring the loaded storage arrangement, the clearance needed to change weights, and the area used by your widest exercise. A compact selector block suits a small permanent footprint when its range is sufficient. A twist-handle pair suits regular load changes where both trays remain accessible. A manual plate-loaded system works when you have a stable loading surface and a practical home for every loose plate.
More from Amazon
Programs that pair well with the guide above. Offers and eligibility are set by Amazon and may change.
Free shipping on eligible items, Prime Video and more. Eligible new members can start with a free trial.
Start a Prime free trialA Prime membership for ages 18-24 with a trial period. Eligibility is set by Amazon.
See Prime for Young AdultsAudiobooks and podcasts to listen to on the go. Eligible new members can start with a free trial.
Try Audible freeAd-free music streaming. Eligible new subscribers can start with a free trial.
Try Music Unlimited freeAs an Amazon Associate we earn from qualifying purchases.









Write Your Review
No reviews yet. Be the first to share your experience!