
The right weight lifting chains for small spaces fit beneath both sleeves without spilling into the bench path or walkway. Start by measuring where the bar hangs at the bottom and top of the lift. Then choose the main chain, feeder, and floor protection around that range, with a secure place to store the pair.
Measure for weight lifting chains for small spaces
A chain setup uses the floor area below each sleeve, plus whatever room you need to load plates and enter the rack. Measure with the bench, safeties, and plate storage in their normal positions. Work out where the chain hangs and where it collects when more links are supported by the floor.
Measure the bar at both ends of the lift
Record the height of the attachment point at the bottom and top of the movement. The height of the J-cup gives you a place to start and can differ from the bar’s work position. For a bench press, check how far the bar travels in your normal setup and where that path sits relative to the bench legs.
Use the actual bar height for each lift. A deadlift starts closer to the ground than a squat, and changes in plate diameter can change that starting height. A lower squat or a different bench position can create more chain slack on the floor. Plan for the lift you perform, rather than the position that looks best when the rack is empty.
Mark both attachment positions using a tape measure and a light mock-up. Then picture the chain dropping directly beneath them. If the locations shift as the bar moves, check the whole path. A rack leg can be clear at the starting height and still sit where the chain gathers as you lower the bar.
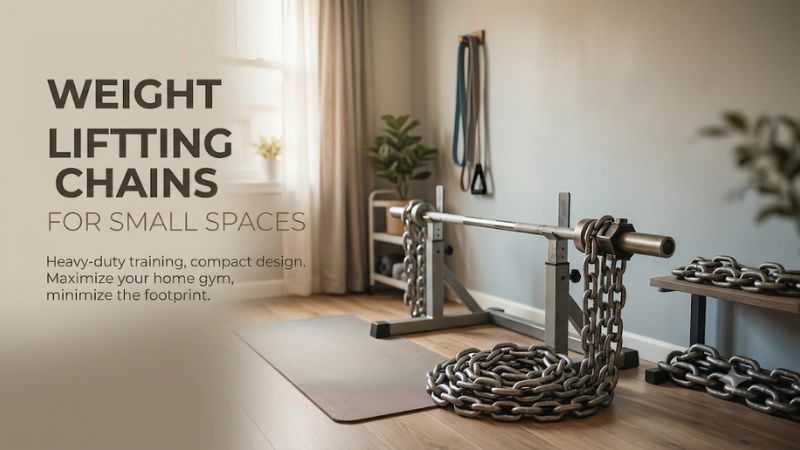
Map the floor pile and the walking lane separately
Reserve a designated area for the links to settle on each side. At the lowest working position, more chain can lie on the floor. Account for the space taken by links that gather rather than lying in a neat line. Check the space with shoes, spotters, and a bench in their usual positions.
A narrow garage may have enough room for the main pile and still lack room to approach a sleeve with a full-diameter plate. Trace the path to pick up, carry, and slide that plate on from the end. You may need to move nearby storage or shift the approved rack layout to keep both functions available.
Leave the approach to your rack or floor setup clear while you train. If the only place for the chain pile is directly under a normal foot placement, adjust the layout before adding load. Moving the plate stand or choosing a different station can solve this more effectively than buying a shorter chain in isolation.
Include the width of the bar and attachments
Measure the complete sleeve assembly, including plates, plate-retention hardware, and the chain attachment specified for the bar. On a short sleeve, the attachment can be the first point of failure even when the chain drops inside the floor area. Verify the manufacturer’s intended arrangement for every item on the sleeve.
A buyer with a compact rackable bar may have only two inches left after thick bumpers and the usual collar. An attachment that requires more space makes that combination unsuitable. Confirm exactly where and how the mount fits. Avoid putting a connector in an unapproved location to make the setup fit the room.
The farther out the drop point sits, the more likely it is to reach a nearby cabinet, mat edge, or storage peg. Measure both ends separately. A small change in the plate layout can shift the position where the chain lands, even though the rack and total bar length remain the same.
Choose the chain length and attachment for your room
The main chain provides the working mass. A feeder or loader positions it lower and can change when links rise. A direct collar mounts the chain near the sleeve. Decide which arrangement creates the most useful pickup for your lift, while leaving the chain a clear space to collect and rise on each side.
Choose a shorter main chain when excess pile is the problem
A four-foot main chain gives you less material to gather and store than a longer chain of similar design. It is useful when you train in one station and know your available floor area. Choose its mass and mounting point together, since a shorter chain can clear the floor earlier if the attachment is high.
Suppose your lowest bench position leaves most of a six-foot chain on the floor. A shorter pair may reduce the amount of chain that needs to sit beside the bench. Test what happens at the top. If the shorter pair is already fully hanging before the last part of the press, any additional rise creates little further pickup.
That can be an acceptable training choice if you want the increase earlier. If you want progressive pickup farther through the movement, a different feeder position or main-chain length can give a better match. Measure first rather than choosing the shortest model solely because the room is small.
Adjust the feeder when the floor area is enough but the timing is wrong
A feeder can lower the working chain relative to the bar. That can put more links on the floor at the bottom and shift pickup later in the range. Use the manufacturer’s adjustment method and keep both sides matched. The useful length depends on the actual connection and where the chain starts gathering.
For example, a kit with four-foot feeders may give you several mounting positions. A longer lead can make sense for a higher squat setup. When you move the same equipment to a bench, extra lead may leave too much of the main chain supported throughout the press. Record a separate approved setting for the bench.
Keep unused length in the manufacturer-approved arrangement and clear of the bar path. In a small room, excess lead near an outer plate can change where you reach to remove collars or alter how the chains settle. A clearly marked setup can make the transition between lifts easier to repeat.
Use direct attachment collars where the geometry is already suitable
A direct-mounted chain can make setup shorter in steps when the supplied attachment collar fits the bar and its drop height suits the movement. This is most useful for a gym where one bar and lift see nearly all the chain work. Check shaft and sleeve space with the intended plates installed.
Direct mounting can be easy to reproduce because you do not have to select a separate feeder position each time. It can also leave less freedom to position the main chain when benching and squatting on the same day. Verify the pickup at both heights or use a different manufacturer-approved mounting option.
Confirm how the attachment and the bar’s plate-retention hardware work together. A tight room can make some closure systems awkward to operate around the chain. Practice the installation and removal on an unloaded bar before you change plates during a workout.
Keep steel, flooring, and noise in the same plan
A short floor pile can still disturb a shared room. Noise can come from links meeting the floor, links touching each other, and connectors bumping the equipment. Evaluate the full chain path at a controlled load and use a floor surface and equipment configuration suited to your building and training method.
Test a suitable floor surface beneath the chain piles
A stable platform or appropriate gym flooring can reduce direct contact with the underlying surface. Keep the chain on the protective area across the full bar path. Avoid an unsecured edge that can trap a link, shift the landing position, or become an obstacle when you move around the rack.
Setup height and floor height work together. Adding a protective surface changes the point at which links start leaving the floor. If you bring in a thicker platform or an approved buffer under the chain, recheck how much chain rises near the bottom and top. The same feeder setting may feel different after a flooring change.
In a garage, check whether the rack sits across a slope or seam. Both chains need a similar floor relationship for consistent pickup. A visibly uneven floor is a reason to choose a suitable training setup or location and remeasure rather than trying to compensate with randomly different feeder lengths.
Compare bare and covered chains for a shared room
A covered chain such as Sorinex Monster Chains reduces direct steel contact at covered parts of the assembly. Rogue also offers a separate sheath set for compatible use. These options can help if the chain repeatedly brushes equipment or lands on a surface you want to protect. Check the entire assembly for noise.
A cover may damp some contacts and still leave connector noise or vibration through the floor. Test under normal conditions at an appropriate load and see what the neighboring room hears. Avoid treating a cover or a thin mat as proof that a building can support a particular setup. Verify the room’s requirements where applicable.
Inspect covered chains as directed by the manufacturer. Look at the cover, its stitching, and exposed connectors. Establish a storage spot where damp equipment can be cared for appropriately. Bare links are easier to see, while a cover earns its space when it solves a recurring issue in your room.
Decide if a quiet alternative would fit more of your routine
Where noise rules limit chain use, the best variable-load setup might use bands with appropriate manufacturer-approved anchors and space for their travel. Straight weights can also fit a small room when variable loading is optional and you mainly want a reliable way to progress squats, presses, or pulls.
Compare the actual station rather than the item in storage. A band is small when rolled up and can require more floor planning for anchors and tension paths. A chain can occupy more space in use and need no separate floor anchor in a suitable conventional chain arrangement. The available room decides which option fits.
If you only plan to use chains occasionally, check whether a different room or approved training station is available before redesigning the home gym. Your regular equipment can remain useful for most sessions, while chain work can take place where the floor and neighboring areas support it.
Plan the layout around the exercise you do most
Bench work, squats, and floor pulls place the bar and your body in different parts of a compact room. Start with one exercise, then check how the same equipment works at the other heights. That sequence protects you from buying a setup that fits while the bar is racked and fails when the movement begins.
Bench press in a garage rack with a narrow side aisle
Position the bench and safeties as you actually use them. Mark the attachment points at the top and bottom of a press. Check whether the chain lands beside the bench feet and whether a helper can approach without stepping around a sleeve, chain pile, or bench corner during the set.
If the chain collects where you need to stand, try a manufacturer-approved position that keeps the drop point clear or choose a different station. A shorter main chain can help where excess chain is the issue. If the bar itself is too close to a wall for ordinary loading, address access to the sleeve first.
Check the pair with the height of your usual plates and the attachment in its intended position. Repeat with the bench set up for each variation you perform regularly. A small bench shift can place a chain near a crossmember that was clear in the flat position.
Squats in a shared garage bay
A squat begins at a higher bar position and can create a longer vertical drop than a bench press. The feeder needs to place the working chain at the height you want. Measure while the garage door and stored items are arranged as they are during a workout. Check both the unrack and working positions.
Walk through the unrack and return with your usual stance and equipment. Both chain piles need an unobstructed area outside your feet and away from the path through the rack. If the chains shift or snag when the bar moves from the hooks to the working position, stop and reassess before increasing load.
A shared garage can benefit from repeatable markers indicating where equipment rests between sessions. Put the chains and feeders away after training and check floor space before moving a vehicle or returning stored items. A compact setup should fit the way the room is used throughout the day.
Deadlifts in a basement or multipurpose room
The bar starts low and your stance may be near the area where the chains collect. Stack position matters before the bar breaks from the floor. Use whatever loading method the manufacturer recommends for floor pulls, and clear space around the plates so the chains can rise without touching your shoes.
If you also train with chains on a rack in the same room, determine separate settings and document them. A long feeder that works for a squat can put too much chain on the ground during a deadlift. A setup with very little chain pickup through the pull gives a smaller change than the package mass suggests.
Account for carrying the equipment downstairs. Split the matched assemblies for transport and use stable, suitable storage close to the station. You gain little from a smaller chain setup if you still need to carry loose heavy steel through a crowded hallway for each session.
Store and reset weight lifting chains for small spaces
Give each assembly a consistent storage location at a manageable height. Keep the connectors and feeders with the pair they fit. Before finishing a session, reset the floor area, return plates, and clear the walkway. This makes the next setup faster and helps you notice a missing or mismatched component.
Choose low storage or a compatible rated hanger
A stable low tray or compartment can keep the pair away from foot traffic. A rack hanger can work if it is designed and rated for the intended load and approved for the rack. Check how you reach the chains and where they hang so they do not interfere with attachments or bar travel.
Store heavy pieces in a way you can manage comfortably. Carry one assembly at a time if needed and follow the equipment’s handling guidance. A single bundle may save shelf space and be difficult to move. Separate compartments can make it easier to keep the left and right sides identifiable and ready for use.
Record the heaviest combined storage load if your hanger holds several pairs. Feeder chains, covers, and connectors add weight. Keep the stored pile within the holder’s stated use and clear of the equipment you adjust regularly.
Write a setup card for each lift
A simple note can record the chain pair, feeder position, bar position, and floor contact area for the lift. Record approximate load contribution at the bottom and top if you measured it. Put the note where the equipment is stored so the same setup can be restored even if someone else uses the rack.
For example, your note might identify the chains by model, specify the same feeder link on both sides, and describe the mat location used for your usual bench. If you change to a thicker mat or a new plate stack, update the record after checking the load again. The note saves time only when it matches the equipment.
Run a light check whenever a major rack, bar, or flooring change affects the geometry. Look at the chain position at the lowest point, the highest point, and during the transition. If links catch or the load rises unevenly, correct the setup before continuing.
Use a quick checklist before buying
Compare the main-chain length, total equipment mass, and included parts against your real layout. Check where the lowest position creates the largest floor pile, how you load the nearest sleeve, and where the chains will go between sessions. Choose a pair only after you can picture one full workout in that setup.
| Check | What to verify |
|---|---|
| Bar and attachments | Both sides have the required sleeve and mounting clearance |
| Lowest position | Links collect clear of the bench feet, shoes, and walkways |
| Highest position | Chain pickup follows the intended loading profile |
| Floor | Surface, protection, and noise suit the room |
| Changes | Feeder and connector settings can be repeated on both sides |
| Storage | Both assemblies stay together in a suitable spot outside the lift zone |
If any check fails, identify the exact cause. A shorter chain can help with pile size, a different feeder can change the timing, and moving an obstruction can recover a loading lane. Make the change that directly addresses the problem you measured.
Conclusion
Choose compact weight lifting chains around the lowest and highest positions of your main lift. A shorter pair can reduce floor pile, an adjustable feeder can shift pickup, and covered links can reduce direct floor contact. Leave both sleeves accessible and make sure every link, connector, and stored component stays clear of the lifting path.
More from Amazon
Programs that pair well with the guide above. Offers and eligibility are set by Amazon and may change.
Free shipping on eligible items, Prime Video and more. Eligible new members can start with a free trial.
Start a Prime free trialA Prime membership for ages 18-24 with a trial period. Eligibility is set by Amazon.
See Prime for Young AdultsAudiobooks and podcasts to listen to on the go. Eligible new members can start with a free trial.
Try Audible freeAd-free music streaming. Eligible new subscribers can start with a free trial.
Try Music Unlimited freeAs an Amazon Associate we earn from qualifying purchases.









Write Your Review
No reviews yet. Be the first to share your experience!