
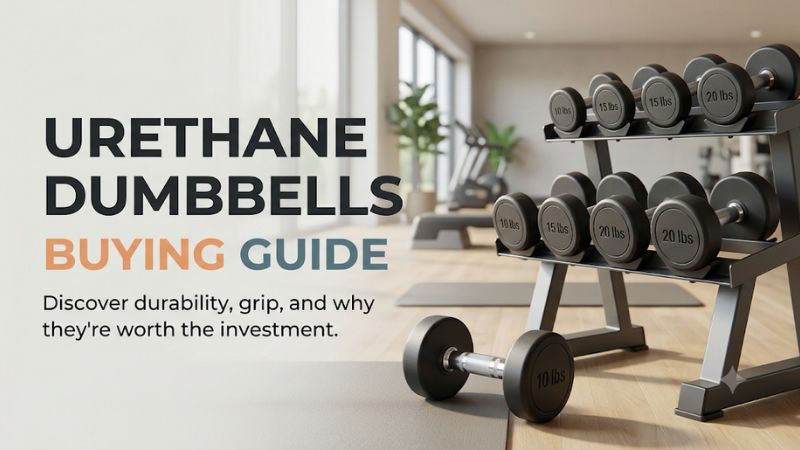
This urethane dumbbells buying guide starts with the weight you need per hand, then checks which shapes, grips, and rack positions fit. Learn how to read material claims, calculate the cost of expanding, and inspect a new pair before you lift with it. Put your money into features you will use every session.
Decide what the first purchase needs to do
Start with the lifts that account for most of your training and write down how many weights they use. Choose singles, pairs, and bundles from that list. Once you know the first two or three useful loads, you can compare exact models, identify meaningful gaps, and check what it will cost to expand.
Record per-hand load, exercise, and number of pieces
A person who floor presses with 20 lb in each hand needs two 20 lb dumbbells for that movement. A one-arm row at 35 lb needs one 35 lb dumbbell if both sides go in turn. Recording the number of pieces next to each exercise separates actual working loads from a listing’s total package weight.
If you train with a partner, ask whether both of you use the same load at the same time. Two people can share one pair across different work intervals. Simultaneous paired exercises require enough matching handles to go around. That demand can make a second pair more useful than buying an additional size that appears in neither person’s log.
Choose loads from workouts you can repeat through a suitable range of motion. Machine labels and previous one-off efforts are imperfect measures of where to begin with dumbbells. If you can try an equivalent weight at a store or gym, note the lift and grip diameter as well as the label. A 25 lb dumbbell with a wider handle can challenge grip differently from a model you already use.
Plan larger and smaller increments by exercise
Check which movements will actually need a smaller step. A jump from 10 to 15 lb adds 50% per hand. A jump from 40 to 45 lb adds 12.5%. A catalog that looks broad because it covers heavy sizes may still skip the 12.5 lb or 17.5 lb weight that makes an upper-body progression easier to manage.
Decide which weights you expect to use over the next few months. If an accessory lift regularly calls for 12.5 lb and you already have 10 and 15 lb, the intermediate pair fills a specific need. If a row is likely to progress comfortably from 40 to 45 lb, a larger jump can save the storage space and expense of adding an intermediate pair there.
Check set contents separately from pair options. A brand can sell a 12.5 lb pair individually even when its standard set comes only in 5 lb steps. The catalog may also offer heavier weights mainly in blocks. Compare the price of ordering the next single useful pair with the cost of buying a set of multiple weights before committing to a line.
Translate set names into a written inventory
A listing for 25 lb may describe each member of a pair, one weight, or a package total. Read the unit count and load per piece. Write down exactly what will arrive. Use that list to decide how many rack positions you need and how much actual equipment weight the storage will carry after delivery.
| Purchase | Pieces | Nominal equipment weight | Appropriate use |
|---|---|---|---|
| One 30 lb single | 1 | 30 lb | Alternating rows or carries |
| One 25 lb pair | 2 | 50 lb | Two-dumbbell movements using 25 lb in each hand |
| 15 and 30 lb pairs | 4 | 90 lb | Two working loads across several lifts |
| 5–25 lb set in 5 lb steps | 10 | 150 lb | Several lighter working loads, potentially shared |
| 5–50 lb set in 5 lb steps | 20 | 550 lb | Ten pairs with dedicated storage and a delivery plan |
A set may be delivered in separate cartons, so a total shipment weight can include packaging or a rack and differ from the lifting weight. Confirm both weight quantities if the order is heavy. Ask where the carrier will leave it and how damage to one package is handled before assuming you can open and inspect every piece at once.
Read the construction and fit specifications
Coating, head shape, and handle geometry each affect a different part of use. Start with a named coating and a clear specification for the exact product. Then inspect the shape that rests on your floor or rack and the grip you will hold for every repetition. The model family name is only a starting point.
Identify the coating and the head attachment
Urethane dumbbells have a polyurethane exterior on the weight heads in the common commercial-style designs discussed here. The core supplies most of the mass. The outer material affects contact and wear, while the head-to-handle joint determines how the loaded head connects to the grip.
Some product pages specify cast polyurethane, often abbreviated CPU. Others say urethane without identifying the process. A documented process tells you something about construction, while meaningful comparisons of abrasion, tear resistance, or impact require data from compatible test conditions. If two products have similar prices, favor the one that documents the parts you can use to check fit and construction.
Look for a description of the head attachment as well. Some designs use a welded joint, and others describe a bonded or mechanically secured assembly. A head that cannot be serviced separately may require replacement of the complete dumbbell if its joint fails. Check the warranty terms and replacement procedure for your usage setting and seller.
Check the shape in both the resting and lifting positions
Round heads can make contact with the thighs and rack differently from faceted heads. Facets give the bell a predictable resting face on a firm level surface. The edge profile and head diameter still affect how easily you can guide the bell close to your body or remove it from a particular support.
For a floor press, compare how the dumbbells pass near your arms in the bottom position and whether the heads meet before your wrists reach a comfortable position. For a goblet movement, look at the end face and inner edge you intend to hold. Two heads of the same nominal diameter can have different tapers, so a top-down photo can hide a useful design difference.
For the rack, check whether the dumbbells are supported by the heads or by the handle in the intended cradle. Head-supported designs need the right diameter and spacing. Handle-supported designs need a usable shaft section at the contact point. A shaped urethane head can fit differently from the rubber hex or round model the rack manufacturer used in its photos.
Measure the grip diameter and the usable opening
A grip has a diameter, a shape, and a clear length between the heads. The textured part can be shorter than the opening. Straight handles give your fingers a consistent shaft profile, while a contoured handle thickens at the center. Your hand size and how you change position can make either shape preferable.
Rogue specifies a 31 mm handle through 45 lb on its urethane line and 34 mm from 50 lb upward. REP specifies 32 mm from 5 to 50 lb and 34 mm from 55 lb in its pound line. If you train across either transition, the load and grip diameter can change at the same time. Account for that when planning carries or rows that already tax your grip.
Measure the usable opening if you train with gloves or if your knuckles can brush the heads during curls. If you can see the pair in person, hold a familiar load briefly with your ordinary grip, then check the position you use for picking it up and setting it down. Take the advertised length as an upper reference until you know where your hand will actually sit.
Interpret weight tolerance at the intended load
A tolerance tells you the permitted deviation from the nominal weight. It gives a useful purchasing reference before you have the pair in hand. A tighter published tolerance may matter when you compare left and right working weights or when you track small progressive changes across several pairs.
On a nominal 40 lb dumbbell, ±1% corresponds to 0.4 lb either side of the label, and ±2% corresponds to 0.8 lb. Two units can be within a tolerance while sitting at different points inside it. When a close match matters, ask about the exact line and use an appropriate scale to compare the two bells after delivery.
Do not confuse weight tolerance with a load rating, durability measurement, or level of knurling. If two pairs differ by a small measured amount, check the scale’s own resolution and repeatability before attributing the difference to the product. Weigh both under the same conditions on a stable surface with the appropriate capacity.
Check delivery, storage, and the cost of expansion
The pair price is the first figure. Add applicable tax, freight or shipping, any rack required for the head shape, and suitable floor protection. When planning a collection, calculate how the loaded dimensions will change and check that the building, delivery route, and storage can support your chosen setup.
Account for rack mass, capacity, and hand access
Add up the full equipment weight. A 5–50 lb set in 5 lb steps gives 550 lb of dumbbells before including the rack. If several pairs sit on one shelf, compare their total with that tier’s rating, follow the rack maker’s loading instructions, and leave space to remove a heavy pair while standing securely.
For round heads, use a compatible cradle or retention arrangement. The bare length of a shelf says little about whether a head will settle securely. Measure the lip and support surfaces, then inspect whether the weight bears where the rack maker intended. If a head rocks at the contact point or can roll off the end during normal removal, the layout needs to change.
Set the highest frequently used weight in a convenient position within the manufacturer’s loading guidance. It should come clear with a stable grip and return without knocking neighboring weights. Uprights, wall trim, and adjacent equipment all affect the path. If the storage forces you to carry the bell sideways away from your body before you can lower it, try a different layout.
Look beyond the first pair price
A great price on one weight can hide a costly gap in the progression. Compare availability and delivered total for the next two weights before choosing a line. A slightly higher starting cost can make sense when the later sizes are sold individually and continue to fit the rack and grip dimensions you want.
If you are comparing a bundle that includes a rack with a rack-free listing, put a realistic value on the storage you would otherwise buy. Use the rack only if it fits the measured equipment and the room’s access. A package with too many light weights or incompatible storage can become expensive even at a lower per-pound price.
Include any fees required for the location where the equipment will arrive. A heavy order placed at the curb or front entrance still needs a plan for moving the pieces. Ask whether cartons are delivered separately and what the seller needs if one piece arrives damaged. Keep any return limitations in mind when shopping sale or closeout configurations.
Inspect both pieces before putting them into service
Confirm that the same per-bell weight is marked on both heads and that the correct number of pieces arrived. Check the handle surface, the seams where the heads meet the grip, and the areas that will rest on the rack. Look for cracks, deformation, visible movement, and damage that changes how a bell sits.
Compare the resting position of the pair on the intended support. Two fixed dumbbells should provide a similar feel and balance at the same listed load. If something is visibly loose or the heads sit differently because of damage, contact the seller before lifting. Photograph the packaging and the affected area and retain the label and order information.
Keep the model name, product generation, finish, and handle dimensions where you can find them. Similar products can have different versions over time. When replacing a single item, those details help you match the existing unit. When ordering another pair at a different load, the same information helps confirm the grip profile and rack design will remain compatible.
Frequently asked questions
Most purchasing mistakes come from applying a statement about one weight or product family to another. Check the exact variant in your cart and compare it with your plan for lifting and storage. These questions cover when urethane is worth buying, how to verify fit, and how to maintain the finished pair.
Is cast polyurethane worth paying extra for?
It can be worth the price when the exact model offers a documented shape, grip, or attachment that solves a real need. If the main attraction is the coating, look for relevant evidence of how the finish performs in use. Compare total cost, the warranty terms, and whether much of the intended use occurs over protected flooring.
Should I choose a 31, 32, or 34 mm handle?
Use the grip you can hold securely at the intended load with the hand placement your exercise requires. A 31 or 32 mm shaft may suit someone who prefers more finger closure, while a 34 mm handle can feel comfortable for a larger hand or different grip preference. Compare the handle opening and texture along with shaft diameter.
Do I need a rack made by the dumbbell brand?
A rack from another brand can work when it supports the intended head shape, selected size, and total weight within its published limits. Verify the support points and hand clearance, and follow the rack maker’s instructions. Contact both manufacturers if the rack fit is tight or if you plan to store unusually large heads.
How should I clean urethane dumbbells at home?
Follow the care instructions for the coating and handle finish. After training, wipe away perspiration and keep moisture from collecting around seams or inside the grip texture. Use cleaners compatible with the manufacturer’s finish and dry the pair before storing it. Avoid leaving a wet bell against an unprotected surface.
Can I buy only one heavy urethane dumbbell?
Yes, if the seller lists singles and you need it for an exercise that uses one weight. Check the count explicitly. Many commercial-style listings sell pairs even when the selected weight is labeled once. If you intend to add a matching single later, keep the model number and check that the same finish and grip can be sourced.
Conclusion
Buy the per-hand loads that fit your routine, then match the exact grip, head shape, and tolerance to your preferences and storage. Price the next pair and any new rack before buying a bundle. Confirm the quantity and dimensions at checkout, and inspect each bell on arrival before adding it to your training setup.
More from Amazon
Programs that pair well with the guide above. Offers and eligibility are set by Amazon and may change.
Free shipping on eligible items, Prime Video and more. Eligible new members can start with a free trial.
Start a Prime free trialA Prime membership for ages 18-24 with a trial period. Eligibility is set by Amazon.
See Prime for Young AdultsAudiobooks and podcasts to listen to on the go. Eligible new members can start with a free trial.
Try Audible freeAd-free music streaming. Eligible new subscribers can start with a free trial.
Try Music Unlimited freeAs an Amazon Associate we earn from qualifying purchases.









Write Your Review
No reviews yet. Be the first to share your experience!