
The right rubber hex dumbbells for small spaces fit both the storage spot and the space you move through during a workout. Start with one or two useful loads, measure the heaviest bell you expect to own, and check how you will pick it up. A rack earns its footprint when it keeps more floor clear than storage at ground level.
Choose the smallest useful dumbbell setup
Start with the exercises you already use and the loads they require. A single bell can serve rows, split squats, and suitcase carries. A matched pair becomes worthwhile when your routine includes two-handed presses or a weight in each hand. Save room for the next useful load where it will make a difference.
One dumbbell for a room that changes purpose
A single bell is a practical starting point when the room becomes a gym only for the duration of the session. You can pick it up, complete both sides, and park it in the same spot. One-arm rows, offset split squats, and suitcase holds can all use a single dumbbell if that weight fits your ability.
Match the purchase to the lift you care about most. If you can row a heavier weight than you can control for an overhead press, a single fixed weight will give one exercise priority. You could already own a light pair for the press and still gain useful training options by buying a single heavier bell for rows. Write down which exercises share a load. A single purchase has more value when it can replace several improvised workarounds.
A low open spot with a suitable floor protector often gives one heavy dumbbell better access than a closed storage box. You can see the bell, take the handle directly, and avoid reaching into a bin. Keep that spot out of a doorway, beside a route where nobody needs to step around the weight, and inaccessible to children where relevant.
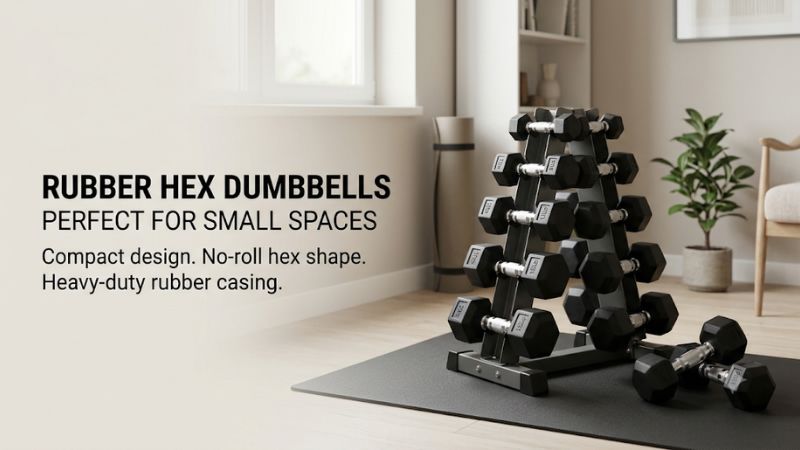
Two carefully chosen pairs for floor presses and leg work
Two pairs let you train with a lighter matched load and a heavier matched load, with each pair ready to pick up. A light pair can cover pressing or accessory work, while a heavier pair can serve hinge or lunge patterns. The right numbers come from your current training rather than a starter bundle.
Imagine a buyer who has already used 15 lb per hand for floor presses and 25 lb per hand for Romanian deadlifts. Those two pairs add up to 80 lb of weights. The same buyer might get less use from four lower pairs, even if the bundle appears to offer better value per pound. Use your actual numbers, including what you can lower under control.
If your plan calls for one heavy bell for suitcase work plus a medium pair for presses, buy three pieces. A single 30 lb dumbbell and a 20 lb pair use three storage positions and weigh 70 lb combined. A fourth piece only earns a place if a two-bell lift needs it. Draw the positions on the floor before buying furniture for them.
Decide when the next pair earns its footprint
A new pair earns space when it solves a repeatable problem. A press that has progressed past one weight may benefit from the next increment. A lift that briefly feels easy can often wait while you test whether the same load works across multiple sessions at the pace and range of motion you normally use.
Smaller jumps can matter more for upper-body accessory exercises than for heavier movements. For example, 10 to 12.5 lb is a 25% increase per hand, while 10 to 15 lb is 50%. A pair that bridges that gap may be worth storing if you repeatedly need it. Before buying the entire 5 lb progression, make a shopping list of two next weights and check whether they are available as single pieces or matching pairs.
When the room is full, decide what would move out if you buy more. If the answer is “the person who already uses that space,” consider a selectorized pair or a different storage location before buying. Existing exercise clearance is a resource. Losing it for two weights that see occasional use can make the whole setup less convenient.
Measure rubber hex dumbbells for small spaces
A useful layout has three parts. The dumbbells need a resting spot, your hands need a path to carry them out, and each exercise needs room from its starting position through its longest reach. Take all three measurements in the room as it is normally used, with doors, chairs, and bedding in their usual places.
Measure the heaviest bell and the way you remove it
Check overall length, maximum head width across the flat orientation you will use, and the height of the bell while resting. Add room for the hand to reach the handle. Storage under a shelf, for example, requires enough height to lift the bell over a lip and enough depth to keep it from sticking into a walking path.
Titan lists its 25 lb rubber hex dumbbell at 12 in long and 5.25 in wide. Put two cardboard rectangles of those dimensions next to each other and try to reach the places where the handles would be. In a straight side-by-side footprint, the two bodies alone take up 10.5 in of width if the heads align. Space between them, end clearance, rack lips, and the path to lift them all increase the requirement. A mock-up should use the exact model and weight you intend to buy. The dimensions of a neighboring size can differ.
If a product page lists just one length, measure the actual dumbbell in a store or ask for the remaining dimensions. A 12 in bell can still be wider than a narrow rack slot. Where possible, inspect the return terms before ordering heavy hardware for a close-tolerance space.
Check the longest reach of your normal exercises
Floor presses need room for both elbows and a way to get into position with the weights. A one-arm row needs room for the bell to travel below and behind the arm without hitting furniture. A split squat needs enough clearance for the rear foot and for the weight to pass outside the front leg.
A practical check is to complete a slow, unloaded rehearsal. Include the step you use to collect and return each bell. Look for furniture at hand height, baseboards at floor level, a low ceiling or fixture during an overhead motion, and room for a small adjustment in stance. Different bodies and exercise techniques require different clearances. The usable area comes from your own motions, not a universal square-foot number.
Keep the landing spot out of the range of moving parts. A door that opens over your mat or a chair that can roll into the path makes a layout unreliable. If a bench or table is part of the setup, confirm it is intended to support the exercise and stays stable through the whole movement.
Account for setup and teardown in a multipurpose room
If you must move a coffee table, open a closet, roll up a rug, and pull four dumbbells out from under a bed before every session, you will spend more time preparing the room. A small home setup works best when it takes only a few movements to get a clear area and return everything after training.
For a shared room, keep the weights close to their set-down spot without letting them sit inside the walking lane. Mark the acceptable storage area mentally or with a removable floor marker if the surface allows it. Then rehearse putting them away under control after a normal set. Fatigue makes a tight reach or awkward turn more noticeable.
In a studio, the period after training matters too. If you plan to clean the weights or air out a mat, make sure they can dry without forcing anyone to step over them. A location that works only when equipment is dry, the door is shut, or a chair is pushed to exactly one spot may be too fragile for everyday use.
Choose storage that matches the room and load
The best storage for two bells can be a low floor position with direct access. More pairs can justify a rack that leaves the center of the room open. Compare the loaded dimensions, stability, material compatibility, and clearance in front of each option before you decide where the weights will live.
| Storage choice | Best fit | Measure before buying | Watch for |
|---|---|---|---|
| Low floor position on compatible protection | One bell or one or two pairs | Bell length and width, hand clearance, route to the training area | Obstructions, access by children, and marks under incompatible mats |
| Rated low shelf or tray rack | Several pairs with heavier pieces | Usable shelf depth, lip height, spacing, per-tier rating | Shelf deflection, heads that sit awkwardly, and pinched fingers |
| Rated A-frame rack | Multiple supported pairs in a narrow area | Loaded width, depth, access on both sides, slot dimensions | Head interference, movement during unloading, and limited expansion |
| Closet-level storage with direct access | Equipment put away after most sessions | Door opening, threshold, ventilation, clear pick-up path | Hidden weight, overcrowding, and pulling from a deep reach |
Use a low storage position for heavy, infrequently moved weights
At a low position, the bell stays close to the floor during setup. That reduces the height through which you have to guide it when you are tired. If you store it underneath furniture, the top of the space should leave enough clearance to take a reliable grip without dragging rubber across the floor.
Measure under the lowest rail, foot, or hinge, as furniture openings often narrow beyond the edge. An under-bed location may force you to twist and reach, especially if the dumbbell sits more than an arm’s length from the edge. If your only way to retrieve a heavy bell is to pull sharply by one head, choose another position.
A low tray may organize several bells when each has a clear parking spot. Verify its ability to support the actual total and how it transfers that load to the surface. Containers with handles are useful only if they are designed to carry the intended load, and a heavy stack can make the whole container impractical to move.
Pick an A-frame only when each slot fits
An A-frame can organize a compact group of weights vertically and avoid the extra width of a low shelf. Measure with the dumbbells loaded, since a head or handle may project past the frame. Look at how you approach each side and whether you can clear the other bells during removal.
Check the rack maker’s total capacity, slot limits where listed, instructions for assembly, and supported dumbbell dimensions. Follow the prescribed loading order. Keep heavier bells in designated lower positions when the instructions call for it. If a weight rocks in a cradle or the rack shifts as you remove it, stop and resolve the fit or setup before using it.
A narrow footprint comes with a reach penalty if you push one side tightly against a wall. Some designs need access from the front and both sides. Measure your body position as well as the feet of the rack. A rack that occupies less floor but forces a long sideways reach can still slow down every session.
Verify the surface under the weights
Rubber-coated heads can soften contact and resist rolling on their flat faces. The coating does not make a heavy bell harmless to thin vinyl, tile, or finished wood. Choose a firm, stable protector compatible with the floor finish and use enough area to cover both the storage and landing positions.
Before installing protective material, read the flooring guidance. Some finishes can discolor after prolonged contact with particular rubber compounds or other materials. Use an approved barrier where the flooring maker requires one, and check underneath after the first few sessions for moisture, impressions, or marks. Avoid thick or soft protection if a foot or dumbbell sinks unevenly during use.
Where there is an upstairs neighbor below or shared structure around you, work with ordinary set-downs first. A gentle landing usually addresses more of the problem than relying on the coating. Verify building requirements before adding concentrated storage loads. The weight of the bells plus the rack matters, and a room’s support cannot be inferred from a rack’s rating.
Set up around the way your room is used
Different constraints dominate in an apartment living room, a bedroom corner, or a garage bay. Choose the home for your heaviest bell first, then evaluate how the lighter pieces, floor protection, and exercise area fit around it. A layout that is easy to reset after training is more likely to stay clear all week.
Apartment living room with no permanent training zone
Keep one heavy single or two pairs close to the edge of the available movement area. Leave a floor section large enough to get into position for a press and draw the mat out only when needed. Some people can use the same open zone for split squats and floor presses simply by changing their orientation.
Pick a wall without a door swing or traffic path, and keep the storage near the mat’s usual landing corner. If a sound carries into an adjoining room, treat the place where the bell touches down and the way you lower it as separate variables. Try a controlled set-down with suitable protection and avoid moving the test to a late or quiet hour.
Bedroom corner with a bench or furniture nearby
A bedroom corner can work when the weights have a distinct resting area and the bench’s swing or movement path stays clear. If a foldable bench shares the storage space with the bells, set it up first and check that both feet are stable. Keep the dumbbells where you can reach them during the start and finish of a set.
Measure turning space around the bed and check that drawer pulls, clothes, or an open closet door stay out of the lift. Grip the bell with your wrist in a controlled position before moving it. Choose a place where the last few inches of putting the weight down are as easy as the first few inches of picking it up.
Garage bay shared with a car or storage bins
In a garage with no dedicated gym zone, choose a low storage area outside the car’s path and beyond the swing of occupied doors. Before lifting, check that the vehicle is out of the working area, that you can set the weights down without catching a foot on a mat edge, and that the surface is clear of grit and moisture.
Dry the handle before storage and use the manufacturer’s cleaning directions. Chrome can deteriorate where moisture and perspiration stay in seams. If a rolling cabinet or shelving unit is nearby, verify its intended load and how it holds position in use. Keep the workout setup clear of moving doors or anything stored overhead that can fall.
Frequently asked questions
Once the room layout is known, the final concerns are often practical details about storing under furniture, mixing products, or keeping the apartment quiet. Check actual access and the specific unit you plan to order, as the smallest advertised footprint can omit the space your hand and your normal motions need.
Can I put the dumbbells under a couch or bed?
Yes, if the opening lets you grip and remove each bell smoothly, the floor protection is compatible, and the furniture stays stable. Check the space through the whole retrieval path and keep weights from becoming accessible to young children. A heavy bell that requires a long reach under furniture is a better fit for another location.
Should I stack hex dumbbells to save floor space?
Choose a single layer or a rated rack designed for their shapes. Flat sides limit rolling when each bell sits properly, but a pile can move if the heads are mismatched or another bell is disturbed. A rack also lets you retrieve the lowest or heaviest weight without moving all the pieces above it.
Do I need matching brands in a compact setup?
Use matching models for each left and right pair where possible. Different pairs can come from different brands if each fits the chosen shelf or cradle. Look at the product measurements as well as the labeled weight, since two 25 lb bells can occupy different rack depths or use handles with different diameters.
When should I switch to adjustable dumbbells?
Reconsider fixed weights when you use more load steps than your space can hold or the next rack would consume your working area. Compare the adjustable pair’s size at light and heavy settings, the space needed to dock the handles, and how often you need to change loads. Rehearse the changes in the proposed spot before committing.
Conclusion
Buy the few fixed weights that cover your current exercises, then measure the longest or widest bell before adding storage. Use a low, accessible resting spot for a small setup and move to a rated rack when the loaded layout still leaves room to pick up, use, and return each weight. Let the space you genuinely have determine how many pairs you own.
More from Amazon
Programs that pair well with the guide above. Offers and eligibility are set by Amazon and may change.
Free shipping on eligible items, Prime Video and more. Eligible new members can start with a free trial.
Start a Prime free trialA Prime membership for ages 18-24 with a trial period. Eligibility is set by Amazon.
See Prime for Young AdultsAudiobooks and podcasts to listen to on the go. Eligible new members can start with a free trial.
Try Audible freeAd-free music streaming. Eligible new subscribers can start with a free trial.
Try Music Unlimited freeAs an Amazon Associate we earn from qualifying purchases.









Write Your Review
No reviews yet. Be the first to share your experience!