
Key takeaways
- Using mismatched components: A 1-inch standard handle requires plates and collars made for that system. Olympic plates will not be properly retained by a standard threaded collar.
- Cross-threading the collar: Starting at an angle can remove metal from the threads. Always begin by hand and stop if the collar feels rough immediately.
- Over-tightening: Excessive force can strip threads, bend a collar, or damage a handle. Hand-tight is often sufficient; use only modest wrench pressure when the design calls for it.
- Lubricating without checking instructions: Heavy oil can attract grit and may allow a collar to loosen more easily. It can also make inspection difficult.
- Relying on tape, glue, or improvised spacers: These materials can compress under load or interfere with full thread engagement.
- Ignoring unequal loading: A plate on only one side creates an unstable dumbbell and places unusual stress on the handle and collar.
- Testing overhead first: Always begin with a light, controlled, below-shoulder test.
Loose dumbbell handles are usually caused by a collar that is not fully tightened, damaged threads, a missing washer, or plates that do not fit the handle correctly. The fix is often simple, but rushing it can create a dangerous setup. A collar that backs off may let plates shift during a curl, press, or row; damaged threads can allow a plate to slide off entirely. Over-tightening can also strip the threads or crack a cast collar.
This guide explains how to fix loose threaded dumbbell handles safely, including handles that use star collars and standard 1-inch plates. The process is similar for many adjustable dumbbells, but always follow the weight limit and maintenance instructions supplied by the manufacturer. Set aside about 20 to 30 minutes per pair for a first inspection and repair.
As an Amazon Associate we earn from qualifying purchases at no extra cost to you. Product prices and availability are accurate as of the date shown and are subject to change.

What You Need
| Item | Why | Optional? |
|---|---|---|
| Clean, dry work surface | Prevents plates, collars, and small washers from rolling away and keeps grit out of the threads. | No |
| Clean rag or shop towel | Removes chalk, oil, rust dust, and metal debris from the handle and collars. | No |
| Soft nylon brush or old toothbrush | Cleans the threaded sections without aggressively removing metal. | Optional |
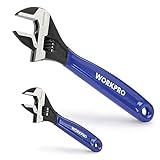
| Adjustable wrench or manufacturer-approved spanner | Helps loosen a stubborn collar. Use only on a collar designed for wrench contact. | Optional |
| Replacement 1-inch standard plates or collars | Useful if the existing plates have oversized holes or the collars no longer hold securely. | Optional |
| Removable blue threadlocker | May reduce loosening on compatible metal threads, but use it only if the handle manufacturer permits it. | Optional |
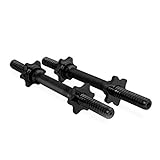
If you need replacement handles, two common options are JFIT Threaded Dumbbell Handles with Star Collars, a set of two that fits 1-inch standard plates and is listed around $21.99, and the CAP Barbell Pair of 14 Inch Regular Threaded Dumbbell Handles, listed around $14.99. Prices can change, and replacement collars may be enough if the handles themselves are sound.
Step-by-Step
-
Unload the dumbbell completely — 2 minutes
Place the dumbbell on the floor or a sturdy bench and remove every plate and collar. Do not try to tighten a collar while holding a loaded dumbbell in one hand. Keep the plates flat so you can check whether they are bent or damaged.
-
Identify what is actually loose — 3 minutes
Grip the bare handle and gently twist each end. Determine whether the handle shaft moves inside the grip, whether a threaded sleeve moves, or whether only the collar loosens. Then inspect the plates. A plate that rocks substantially on a 1-inch handle may have an oversized center hole, even if the collar is tight.
A small amount of rotation between a plate and a standard handle can be normal, but visible side-to-side movement, rattling, or a collar that backs away during hand-tightening requires correction before use.
-
Inspect the handle and collar threads — 5 minutes
Wipe the threads clean and examine them under good lighting. Look for flattened ridges, cross-threading, deep rust, cracks, or metal shavings. Check that the collar spins smoothly onto the handle by hand for several turns. It should not wobble visibly or bind at one particular point.
Inspect the collar’s retaining surface as well. A star collar should have intact teeth or a secure gripping surface. If a collar is cracked, missing a retaining ring, or visibly distorted, replace it rather than trying to repair it with glue.
-
Clean and realign the threads — 3 to 5 minutes
Brush away dry debris and wipe the parts again. Do not file the threads or use a grinder. If there is light surface rust, remove only the loose residue with a soft brush. Avoid soaking the handle in water; moisture can remain in crevices and accelerate corrosion.
Start the collar by turning it backward slightly until the thread start drops into alignment, then turn it forward by hand. If it will not thread smoothly, stop and realign it. Forcing it can permanently damage both parts.
-
Test the fit with one plate — 3 minutes
Slide one compatible plate onto the handle and thread the collar on behind it. The plate should sit flat against the collar and should not contact a damaged or uneven section of the handle. Tighten the collar by hand until the plate is firmly held with no obvious rattle.
Do not stack several plates to hide a loose first plate. If one plate does not sit correctly, adding more weight will not make the setup safer.
-
Load the dumbbell evenly — 3 to 5 minutes
Use matching plates on both sides whenever possible. Keep the total load within the handle maker’s stated capacity; never assume that a 14-inch handle can safely carry every plate that fits. Check that the plates are standard 1-inch plates rather than Olympic plates with approximately 2-inch holes.
With the dumbbell resting on the floor, tighten both collars by hand. If the collar has flats specifically intended for a wrench, use light pressure only. There is no universal safe torque value for all threaded dumbbell handles, so do not use an impact driver or a long pipe for extra leverage.
-
Perform a low-risk movement test — 3 minutes
Before lifting overhead, pick up the unloaded or lightly loaded dumbbell and hold it at your side. Rotate your wrist slowly, then perform a few controlled curls with a conservative weight. Listen for clicking or rattling and watch whether either collar turns.
Set the dumbbell down and inspect it again. If the collar has moved, the threads are damaged, or the plates have shifted, remove the load and replace the faulty part. Do not test a questionable repair with a heavy press, snatch, or other movement that places the dumbbell above your face or torso.
-
Use threadlocker only when appropriate — 2 minutes, plus curing time
Some metal threaded handles can accept a small amount of removable blue threadlocker, but it is not suitable for every design. Do not use it on plastic threads, painted contact surfaces, collars that require frequent adjustment, or equipment whose instructions prohibit chemical thread treatments.
If approved, clean and dry the threads, apply a very small amount to the male thread, assemble the collar, and allow the product to cure according to its label—often about 24 hours. Never use permanent red threadlocker unless the manufacturer specifically directs you to do so.
Mistakes to Avoid
- Using mismatched components: A 1-inch standard handle requires plates and collars made for that system. Olympic plates will not be properly retained by a standard threaded collar.
- Cross-threading the collar: Starting at an angle can remove metal from the threads. Always begin by hand and stop if the collar feels rough immediately.
- Over-tightening: Excessive force can strip threads, bend a collar, or damage a handle. Hand-tight is often sufficient; use only modest wrench pressure when the design calls for it.
- Lubricating without checking instructions: Heavy oil can attract grit and may allow a collar to loosen more easily. It can also make inspection difficult.
- Relying on tape, glue, or improvised spacers: These materials can compress under load or interfere with full thread engagement.
- Ignoring unequal loading: A plate on only one side creates an unstable dumbbell and places unusual stress on the handle and collar.
- Testing overhead first: Always begin with a light, controlled, below-shoulder test.
How Often
Check collars and threads before every workout, especially if the dumbbells are shared, transported, or stored in a humid garage. For regular home use, wipe the threads and inspect the collars once a month. Deep-clean them every three to six months, or sooner if you notice chalk buildup, rust, or repeated loosening.
After the first few sessions with a repaired or newly assembled dumbbell, check the collars after each set. Once they remain secure, a quick pre-lift check is usually enough. Store handles dry and avoid dropping loaded dumbbells, which can deform collars and threads.
When to Call a Pro or Replace
Most loose threaded dumbbell handles do not require a professional repair; replacement is generally safer and more economical. Replace the handle or collar if threads are visibly flattened, cracked, deeply corroded, bent, or unable to hold a collar after cleaning and correct assembly. Also replace any handle that has a loose grip, a moving end cap, or a shaft that is no longer straight.
Stop using the equipment immediately if a plate slides more than slightly, a collar spins freely without tightening, or metal flakes appear during assembly. A sporting-goods repair specialist or the manufacturer can identify the correct replacement when the model uses a proprietary locking system. Do not weld, drill, or grind a load-bearing handle at home.
FAQ
Why does my dumbbell collar keep loosening?
Common causes include dirty or damaged threads, an incorrectly matched collar, an oversized plate hole, uneven loading, or repeated dropping. Clean and inspect all contact points first. If the collar still backs off during a light test, replace it or the handle.
Can I use pipe thread tape to stop a dumbbell collar from loosening?
It is not recommended. Tape can change how the threads engage, bunch up inside the collar, and create a false sense of security. Use a compatible replacement collar or manufacturer-approved removable threadlocker instead.
How tight should threaded dumbbell handles be?
Tighten the collar by hand until the plates are firmly restrained and do not rattle. If the collar has wrench flats, use only light additional pressure and never an impact tool. The manufacturer’s instructions take priority over any general guideline.
Is a little dumbbell plate movement normal?
A small amount of rotational play can occur with standard plates, but noticeable side-to-side movement, loud rattling, or a plate that can shift toward the end of the handle is not acceptable. Stop using the dumbbell until the fit, collar, and threads have been corrected.


Write Your Review
No reviews yet. Be the first to share your experience!